Low Shower Pressure? A Step-by-Step Guide to Diagnosing and Fixing It Yourself
There are few things more disappointing than stepping into the shower, expecting a powerful, massaging spray, only to be met with a weak, lukewarm trickle. Low shower pressure is a common household problem affecting approximately 35% of American homes, but the good news is that you can often fix it yourself without calling a plumber. The cause is usually a simple blockage that’s easy to clear.
This comprehensive guide will walk you through the complete diagnostic process, starting with the most common and easiest fixes right at the shower head, then working our way back through your plumbing system to more complex issues. We’ll cover everything from basic maintenance to advanced plumbing concepts. Let’s restore your shower to its former glory!
Quick Pressure Statistics:
• Ideal Shower Pressure: 45-80 PSI (Pounds per Square Inch)
• Minimum Acceptable Pressure: 30 PSI
• Standard Flow Rate: 2.5 GPM (Gallons Per Minute) for newer shower heads
• Most Common Cause: Mineral deposits clogging shower head (65% of cases)
• Average DIY Fix Cost: $10-50 vs. Plumber Cost: $150-400
Part 1: Understanding Water Pressure Basics
The Physics of Water Pressure: PSI, GPM, and Flow Dynamics
Before diving into fixes, it’s crucial to understand what we’re dealing with. Water pressure isn’t just “strong” or “weak”—it’s measured scientifically:
Key Pressure Concepts:
PSI (Pounds per Square Inch): The force of water pushing against pipe walls. Municipal systems typically deliver 40-80 PSI to homes.
GPM (Gallons Per Minute): Volume of water flowing through a fixture. Federal standards limit new shower heads to 2.5 GPM.
Static Pressure vs. Dynamic Pressure: Static is pressure when no water is flowing; dynamic is pressure during use (always lower).
Pressure Drop: Loss of pressure due to friction, elevation changes, or restrictions in pipes.
How to Measure Your Home’s Water Pressure
Before attempting any fixes, you should know your baseline pressure:
Method 1: Using a Pressure Gauge (Most Accurate)
- Purchase a water pressure gauge (under $20 at hardware stores)
- Screw it onto an outdoor hose bib or laundry room faucet
- Ensure all other water in the house is OFF
- Turn the faucet fully open and read the gauge
- Repeat at different times of day (pressure can fluctuate)
Method 2: The Bucket Test (Flow Rate Measurement)
- Place a 5-gallon bucket under your shower head
- Time how long it takes to fill completely
- Calculate: GPM = (Bucket Size in Gallons) ÷ (Minutes to Fill)
- Example: 5 gallons ÷ 2 minutes = 2.5 GPM (standard)
Water Pressure Test Gauge
Essential for accurate diagnosis. This professional-grade gauge measures 0-200 PSI with 2% accuracy. Features an easy-read 2″ dial, brass construction, and standard garden hose threads. Knowing your exact water pressure is the first step in any pressure troubleshooting.
Check Price on Amazon
Part 2: Start Here: The #1 Culprit is a Clogged Shower Head
In over 90% of cases where shower pressure has gradually declined, the cause is mineral buildup inside the shower head. Water contains dissolved minerals (calcium, magnesium, lime) that precipitate out when heated or when water evaporates, forming hard deposits that block the small nozzles.
The Chemistry of Hard Water Deposits:
Hard water contains calcium bicarbonate Ca(HCO₃)₂ and magnesium bicarbonate Mg(HCO₃)₂. When heated or evaporated, these convert to insoluble carbonates:
Ca(HCO₃)₂ → CaCO₃ (calcium carbonate/limescale) + CO₂ + H₂O
These deposits accumulate at a rate of approximately 1/16 inch per year in areas with hard water (7+ grains per gallon).
Method 1: The No-Removal Vinegar Soak (The “Plastic Bag Trick”)
This is the easiest method and you can do it without any tools. Perfect for weekly maintenance.
- Get a durable plastic bag, like a freezer or storage bag, that’s large enough to fit over your entire shower head. Gallon-sized bags usually work perfectly.
- Fill the bag about halfway with plain white vinegar (5% acetic acid solution). If you have very hard water, you can use a dedicated CLR (Calcium, Lime, Rust) cleaner instead. For tough deposits, use a 1:1 vinegar:water solution heated to 130°F.
- Carefully place the bag over the shower head so the entire head is submerged in the vinegar. Tilt the head downward slightly to ensure complete coverage.
- Secure the bag to the shower arm using a rubber band, zip tie, or string. Ensure it’s tight enough to prevent leaks but not so tight it damages the finish.
- Let it soak. For vinegar, let it sit for at least 2-3 hours for mild deposits, or ideally overnight for severe buildup. The acetic acid reacts with calcium carbonate: CaCO₃ + 2CH₃COOH → Ca(CH₃COO)₂ + CO₂ + H₂O
- Remove the bag and turn on the shower at full blast for 2-3 minutes to flush out all the loosened debris. Use an old toothbrush to scrub any remaining deposits off the nozzles. Finish with a cool water rinse.
Method 2: The Deep Clean (Requires Removal)
If the bag trick doesn’t fully work, or you want a more thorough cleaning, removing the head is the next step. This method is also necessary for cleaning the internal filter screen.
- Unscrew the shower head from the shower arm. Usually, this can be done by hand turning counter-clockwise. If it’s tight, use a wrench or adjustable pliers. Pro Tip: Wrap the connector with a rag or duct tape before using a wrench to avoid scratching the chrome or brushed nickel finish.
- Look inside the connector. You’ll likely see a small mesh screen (usually 30-60 mesh). This is a sediment filter designed to catch particles before they reach the nozzles. Gently pry it out with a paperclip, small screwdriver, or needle-nose pliers and rinse it thoroughly under running water. This screen catches up to 85% of sediment and is often the main cause of sudden pressure drops!
- Inspect the shower arm opening for debris. Use a flashlight to look into the pipe—sometimes mineral flakes or pipe scale accumulate right at the opening.
- Submerge the entire head in a bucket or bowl of vinegar or CLR solution. For stubborn deposits, heat the solution to 140°F (never boil) to accelerate the chemical reaction. Soak for 2-8 hours depending on buildup severity.
- After soaking, use a small brush (toothbrush, pipe cleaner) or a paperclip to poke debris out of each individual spray nozzle. Work systematically to ensure all nozzles are clear.
- For shower heads with rubber nozzles (often marketed as “self-cleaning”), gently rub each nozzle with your finger to dislodge deposits. The rubber flexes to release buildup.
- Rinse everything thoroughly with hot water, put the filter screen back in, and screw the shower head back onto the arm. Hand-tighten, then give it a final quarter-turn with a wrench if needed. Always wrap threads with Teflon tape first (see below).
CLR Pro Calcium, Lime & Rust Remover
When vinegar isn’t strong enough for seriously hard water, this is the solution. It’s incredibly effective at dissolving mineral buildup fast. Contains biodegradable cleaning agents that break down calcium carbonate 3x faster than vinegar. A must-have for any home with hard water issues. Works in as little as 30 minutes for moderate deposits.
Check Price on Amazon
Shower Head Cleaning Tool Kit
Specialized tools make cleaning much easier. This set includes 4 different brushes (including a tiny nozzle brush), a pick set for stubborn deposits, and a descaling solution. The ergonomic handles provide better control when cleaning small nozzles. Essential for maintaining optimal pressure over time.
Check Price on Amazon
Preventive Maintenance Schedule
| Water Hardness Level |
Cleaning Frequency |
Recommended Method |
Estimated Time |
| Soft (0-3.5 gpg) |
Every 6-12 months |
Vinegar soak (2 hours) |
30 minutes active |
| Moderate (3.5-7 gpg) |
Every 3-6 months |
Vinegar soak (4-6 hours) |
45 minutes active |
| Hard (7-10.5 gpg) |
Every 1-3 months |
CLR solution (2 hours) |
60 minutes active |
| Very Hard (10.5+ gpg) |
Monthly |
CLR with heating (1 hour) |
75 minutes active |
Part 3: Is Your *New* Shower Head Low Pressure? Check the Flow Restrictor
What if you just installed a brand-new shower head and the pressure is terrible? The problem is almost certainly the **flow restrictor**. To comply with U.S. water conservation standards (Energy Policy Act of 1992), all shower heads manufactured after 1994 must limit flow to 2.5 gallons per minute (GPM) at 80 PSI. Many states have even stricter limits (1.8 GPM in California, Colorado, New York).
Flow Restrictor Engineering:
Flow restrictors work by creating a pressure drop across a small orifice. The Bernoulli principle states that as fluid velocity increases through a constriction, pressure decreases. Most restrictors are simple plastic disks with a precisely sized hole (typically 0.075-0.125 inches diameter) that limits flow regardless of incoming pressure.
How to Locate and Remove Flow Restrictors
- Unscrew the new shower head from the shower arm (counter-clockwise).
- Look inside the part that connects to the pipe. You’ll see the mesh filter screen, and behind or as part of it, a plastic disc, often brightly colored (red, green, or pink). This is the flow restrictor.
- Some models have the restrictor in a separate chamber. Look for a small rubber O-ring holding it in place.
- Using a paperclip, small screwdriver, or needle-nose pliers, you can usually pry this plastic disc out. It might take a bit of wiggling. Some are threaded and require unscrewing.
- Important: Note the orientation before removal. Some restrictors have directional flow indicators.
- Reinstall the shower head. The difference will be immediate—typically increasing flow from 2.5 GPM to 4-6 GPM.
Legal and Environmental Disclaimer: Removing the flow restrictor will increase your water usage by 60-140% (from 2.5 GPM to 4-6 GPM). This means:
• Water Bill Impact: Additional 10-20 gallons per 10-minute shower
• Energy Bill Impact: 30-50% more water heating costs
• Environmental Impact: 5,000-10,000 extra gallons annually per person
• Legal Considerations: Illegal in some municipalities with water restrictions
• Alternative: Consider adjustable flow restrictors that allow you to choose between conservation and pressure modes
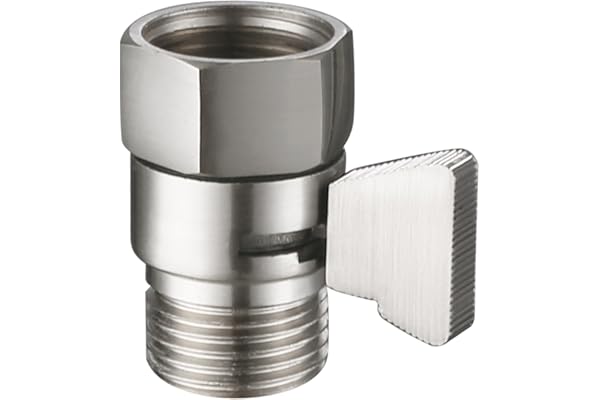
The Compromise: Adjustable Flow Restrictors
For those wanting flexibility, consider these alternatives:
Adjustable Shower Flow Control Valve
This innovative device installs between your shower arm and shower head, allowing you to adjust flow from a trickle to full blast. Features 9 different settings, including water-saving eco modes. Perfect for households that want conservation options but occasional high-pressure showers. Easy install with no tools required.
Check Price on Amazon
Part 4: Comprehensive Diagnostic Flowchart
Low Shower Pressure Troubleshooting Flowchart
Step 1: Initial Assessment
Q: Is the pressure low only in the shower, or throughout the house?
- Only in shower: Proceed to Step 2 (Fixture-specific issues)
- Throughout house: Proceed to Step 7 (Whole-house issues)
Step 2: Fixture-Specific Diagnosis
Q: Has the pressure decreased gradually or suddenly?
- Gradually over months/years: Likely mineral buildup → Clean shower head
- Suddenly: Check for clogged filter screen or diverter valve issue
Step 3: Shower Head Inspection
Actions: Remove and inspect shower head. Clean mineral deposits. Check flow restrictor.
Step 4: Diverter Valve Test
Test: Turn on shower. Is water still flowing from tub spout?
- Yes: Diverter valve failing → Replace diverter
- No: Proceed to Step 5
Step 5: Shower Valve Cartridge Check
Age test: Is your home older than 15 years?
- Yes: Cartridge may be worn → Consider replacement
- No: Proceed to Step 6
Step 6: Pipe Inspection
Check: Are pipes galvanized steel?
- Yes: Corrosion likely → Professional assessment needed
- No: Consider pressure balancing valve issues
Step 7: Whole-House Diagnosis
Check: Main water valve, pressure regulator, water meter valve, whole-house filter
Part 5: When Cleaning Isn’t Enough: Deeper Issues
Critical Diagnostic Step: Turn on other faucets in your house, like the bathroom sink and kitchen sink. Run them at the same time as the shower. Is the pressure low everywhere, or ONLY in the shower? This simple test tells you if you have a fixture-specific problem or a whole-house issue.
The Whole-House vs. Fixture-Specific Distinction
| Symptom Pattern |
Likely Cause |
Immediate Action |
Professional Needed? |
| Low pressure only in shower |
Shower head clog, diverter valve, shower valve cartridge |
Clean shower head, check diverter |
Maybe (for valve replacement) |
| Low pressure in one bathroom |
Branch line clog, local valve issue |
Check shutoff valves under sinks |
Possibly |
| Low pressure throughout house |
Main valve, pressure regulator, water meter, municipal supply |
Check main shutoff valve |
Often |
| Pressure drops when other fixtures run |
Undersized pipes, high demand |
Schedule water usage |
Possibly (for pipe upgrade) |
Common Deeper Issues Explained
1. Diverter Valve Failure
Symptom: Water continues to flow from tub spout when shower is engaged.
Fix: Replace diverter valve. Cost: $50-150 for parts, $200-400 with professional installation.
DIY Difficulty: Moderate (requires access behind shower wall)
2. Shower Valve Cartridge Problems
Symptom: Difficulty adjusting temperature, pressure fluctuations when adjusting.
Fix: Replace cartridge. Cost: $20-80 for cartridge, $150-300 with professional.
DIY Difficulty: Moderate (brand-specific cartridges required)
3. Pressure Balancing Valve Issues
Symptom: Sudden temperature changes when other water is used in house.
Fix: Clean or replace balancing valve. Anti-scald devices can restrict flow.
DIY Difficulty: High (precision adjustment required)
The Galvanized Pipe Problem
Homes built before 1970 often have galvanized steel pipes. These corrode internally over 40-50 years, significantly reducing inner diameter and thus pressure.
The Corrosion Process:
Galvanized pipes have a zinc coating that protects steel. Over decades, the zinc sacrificially corrodes, then the steel rusts. The reaction: Zn → Zn²⁺ + 2e⁻ (zinc corrosion) followed by Fe → Fe²⁺ + 2e⁻ (iron rusting). Rust and mineral deposits can reduce a ¾” pipe’s effective diameter to ¼” or less.
Warning Signs of Galvanized Pipe Issues:
• Brownish water (especially when first turned on)
• Gradual pressure decrease over years (not months)
• Multiple fixtures affected simultaneously
• Home age 40+ years with original plumbing
• Solution: Pipe replacement (PEX or copper) – major project costing $2,000-$15,000
Water Pressure Regulator Adjustment
Most homes have a pressure reducing valve (PRV) where the main water line enters the house. These can fail or be set incorrectly.
How to Check and Adjust Your Pressure Regulator
- Locate the PRV: Usually near the main shutoff valve, water meter, or where the water line enters the house. Looks like a bell-shaped device with an adjustment screw on top.
- Attach a pressure gauge to an outdoor faucet or laundry faucet.
- Check current pressure with no water running elsewhere in the house.
- If adjustment is needed: Loosen the locknut on the adjustment screw. Turn the screw clockwise to increase pressure (usually ¼ turn = 5-10 PSI change). Counter-clockwise decreases pressure.
- Test incrementally: Make small adjustments, then test pressure. Ideal range is 45-60 PSI for most homes.
- Secure the locknut once desired pressure is achieved.
- Warning: Don’t exceed 80 PSI—this can damage appliances and plumbing fixtures.
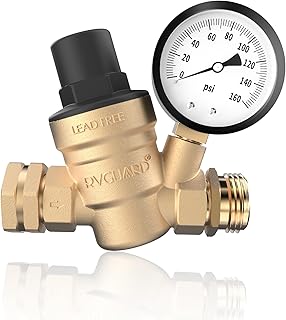
Water Pressure Regulator Valve
If your existing PRV is failing, this replacement model provides precise pressure control from 25-75 PSI. Features brass construction, built-in gauge port, and easy adjustment knob. Essential for protecting your plumbing system from high municipal pressure fluctuations. Includes a 10-year warranty.
Check Price on Amazon
Part 6: Advanced Solutions for Persistent Low Pressure
Shower Pump Installation
For homes with chronically low pressure (below 30 PSI), a shower pump can be the ultimate solution.
How Shower Pumps Work:
Shower pumps are centrifugal pumps that increase flow rate and pressure specifically for the shower. They work on the principle of converting rotational kinetic energy to hydrodynamic energy. Most are rated to increase pressure by 0.5-1.0 bar (7-15 PSI) and flow by 1.5-3.0 GPM.
| Pump Type |
Best For |
Pressure Increase |
Installation Complexity |
Cost Range |
| Positive Head |
Homes with SOME existing pressure |
7-12 PSI |
Moderate |
$200-$400 |
| Negative Head |
Very low or no gravity pressure |
10-15 PSI |
Complex |
$300-$600 |
| Whole House |
All fixtures need pressure boost |
15-20 PSI |
Professional required |
$800-$2,000+ |
| Instantaneous |
Single shower applications |
8-10 PSI |
Simple (in-line) |
$150-$300 |
Pipe Diameter Upgrades
Older homes often have ½” supply lines to bathrooms. Upgrading to ¾” pipes can significantly improve pressure and flow.
Pipe Size vs. Flow Capacity
• ½” pipe: Maximum flow ~4.5 GPM at 60 PSI
• ¾” pipe: Maximum flow ~9.0 GPM at 60 PSI (100% increase)
• 1″ pipe: Maximum flow ~16.0 GPM at 60 PSI
Note: Each 90-degree elbow reduces equivalent length by 1-2 feet of straight pipe.
Water Main Service Line Issues
If your entire home has low pressure, the problem might be between the street and your house:
Municipal Supply Issues
• Check with neighbors—if they have similar issues, contact water utility
• Pressure may drop during peak usage times (mornings, evenings)
• Construction or main breaks can affect pressure
Service Line Problems
• Corroded galvanized service line (common in homes 40+ years)
• Kinked or collapsed polyethylene (PE) line
• Tree root intrusion into pipes
• Faulty corporation stop at street connection
Well Water System Issues
• Pressure tank bladder failure
• Pump wearing out or undersized
• Pressure switch calibration issues
• Clogged well screen or sediment in system
Whole House Water Filter Impact
While whole house filters improve water quality, they can reduce pressure:
Filter Maintenance for Pressure Preservation
- Check filter cartridges monthly – replace when pressure drop exceeds 15 PSI across filter
- Choose appropriate micron rating – lower numbers (5 micron) filter more but restrict flow more than higher (20 micron)
- Consider backwashing filters instead of cartridge filters for less pressure loss
- Install a pressure gauge before and after filter to monitor pressure drop
- Size matters: For homes with pressure concerns, choose oversized filters (4.5″ x 20″ vs standard 4.5″ x 10″)
Part 7: The Ultimate Solution: Upgrade to a High-Pressure Shower Head
Sometimes, an old shower head is just poorly designed. If your cleaning efforts don’t yield results, the easiest and most satisfying solution is often to simply upgrade. “High-pressure” shower heads don’t magically create more pressure from your pipes; they use clever engineering to make the water feel much stronger.
How High-Pressure Shower Heads Work:
1. Air Induction Technology: Mixes air with water streams, creating larger droplets that feel more substantial while using less water.
2. Nozzle Optimization: Smaller, more numerous nozzles (60-100 vs. standard 30-40) distribute water more efficiently.
3. Turbine Chambers: Creates vortex motion that accelerates water velocity.
4. Flow Concentrators: Channels water through narrowing pathways that increase velocity (Venturi effect).
5. Pulsating Mechanisms: Creates intermittent bursts that feel stronger than continuous flow.
SparkPod High Pressure Rain Shower Head
This is one of the most popular and highly-rated models for a reason. It delivers a fantastic, powerful rain-style shower even in homes with low pressure. Features 90 silicone jets that resist clogging, a self-cleaning mechanism, and adjustable angles. The removable flow restrictor allows you to choose between water-saving (2.0 GPM) and high-pressure (2.5 GPM) modes. Made of ABS chrome-plated plastic with brass connectors.
Check Price on Amazon
HOPOPRO High Pressure Handheld Shower Head Set
If you prefer the flexibility of a handheld sprayer, this model is a great choice. It offers 5 spray settings, from a powerful massage jet to a gentle mist, and is specifically designed to maximize pressure using a built-in turbine. The 59-inch stainless steel hose provides excellent reach. Features a 3-zone click lever dial for easy setting changes and a convenient holder with adjustable angle. Perfect for seniors, pet washing, and cleaning the shower.
Check Price on Amazon
Votmell Premium Teflon Thread Seal Tape
Don’t forget the most important accessory! Before you screw on your new shower head, wrap the threads on the shower arm with 3-4 layers of this tape. It creates a perfect, leak-free seal by filling microscopic gaps between threads. This high-density PTFE tape is thicker than standard tape (3.5 mil vs 2.5 mil), lasts longer, and provides better sealing. A single 520-inch roll will last you for years of plumbing projects.
Check Price on Amazon
Shower Head Installation Wrench
This specialized tool makes shower head installation and removal effortless. The rubberized jaws prevent scratching chrome or brushed nickel finishes. Fits most standard and non-standard shower head connections. The extended handle provides better leverage for stubborn connections. Essential for DIYers who want professional results without damaging fixtures.
Check Price on Amazon
Installation Best Practices
Professional-Grade Shower Head Installation
- Clean threads: Remove old Teflon tape and debris from shower arm threads using a wire brush.
- Apply thread sealant: Wrap Teflon tape clockwise (as you look at the end of the pipe) 3-4 times. For extra security, apply a thin layer of pipe thread compound over the tape.
- Hand-tighten first: Screw the shower head on by hand until snug. This prevents cross-threading.
- Final tightening: Use an adjustable wrench or shower head wrench to tighten ¼ to ½ turn past hand-tight. Do not overtighten—this can crack internal components.
- Test for leaks: Turn water on and check for drips at the connection. If leaking, tighten slightly more.
- Check alignment: Ensure the shower head is positioned correctly before final tightening.
Cost Comparison: DIY vs Professional Solutions
| Solution |
DIY Cost |
Professional Cost |
Time Required |
Success Rate |
| Shower head cleaning |
$5-20 |
$100-150 |
30-90 min |
85% |
| New shower head install |
$30-100 |
$150-250 |
15-30 min |
95% |
| Cartridge replacement |
$40-100 |
$200-400 |
60-120 min |
70% |
| Diverter valve repair |
$50-150 |
$300-600 |
90-180 min |
60% |
| Pressure regulator adjust |
$0-20 |
$100-200 |
15-30 min |
80% |
| Shower pump install |
$200-500 |
$800-1,500 |
120-240 min |
50% |
Part 8: When to Call a Professional Plumber
Immediate Professional Attention Required If:
• You see water stains on walls or ceilings near plumbing
• You hear running water when no fixtures are in use
• Water pressure drops to zero suddenly
• You suspect galvanized pipe corrosion throughout the house
• There’s visible leaking from pipes or valves
• You have a well system and pressure fluctuates wildly
What to Expect From a Professional Plumber
A Professional Diagnostic Process
When you call a plumber for low shower pressure, they should:
- Interview: Ask about when the problem started, if it’s gradual or sudden, and which fixtures are affected.
- Pressure Testing: Use professional gauges to test pressure at multiple points in the system.
- Flow Testing: Measure flow rates from various fixtures to identify patterns.
- Visual Inspection: Check visible pipes for corrosion, check valves, and inspect the water heater.
- Camera Inspection: For suspected pipe blockages, they may use a pipe camera.
- Provide Options: A good plumber will provide multiple solutions at different price points.
- Written Estimate: Always get a detailed written estimate before work begins.
Questions to Ask Your Plumber
Essential Questions Before Hiring:
1. Are you licensed and insured? (Get license number and verify)
2. What is your diagnostic process for pressure issues?
3. Do you charge for estimates?
4. What is your warranty on parts and labor?
5. Can you provide references from similar jobs?
6. What is the estimated timeline for completion?
7. Do you offer any guarantees on pressure improvement?
Part 9: Preventive Maintenance Program
Monthly Maintenance Checklist
- Visual inspection: Check shower head for mineral buildup
- Performance test: Note any pressure changes from previous month
- Temperature check: Ensure hot water pressure matches cold
- Listen for noises: Unusual sounds can indicate developing issues
Quarterly Maintenance Tasks
- Shower head cleaning: Vinegar soak or CLR treatment
- Filter checks: Inspect and clean shower head filter screen
- Valve exercise: Turn shutoff valves fully off and on to prevent seizing
- Pressure test: Use gauge to monitor pressure consistency
Annual Professional Maintenance
Consider annual professional maintenance if:
- Your home is older than 25 years
- You have galvanized pipes
- You experience frequent pressure issues
- You have a well water system
- You have a water softener or whole-house filter
Conclusion: Taking Control of Your Shower Pressure
Low shower pressure is more than just an inconvenience—it affects your daily comfort, water usage efficiency, and even your home’s value. By following this comprehensive guide, you’ve learned that most pressure problems are solvable with simple DIY methods. Remember the key principles:
Final Takeaways:
1. Start simple: 90% of pressure issues are solved by cleaning the shower head and filter screen.
2. Diagnose systematically: Use the flowchart to methodically identify the problem’s location.
3. Understand your system: Know your home’s water pressure, pipe materials, and fixture ages.
4. Prevent rather than react: Regular maintenance prevents most pressure problems.
5. Know your limits: Some issues require professional expertise—don’t risk water damage.
With the knowledge from this guide, you’re now equipped to diagnose and fix most shower pressure issues yourself, saving hundreds of dollars in plumber fees while ensuring your shower provides the refreshing, powerful experience you deserve. Remember that water pressure is a combination of physics, chemistry, and engineering—understanding these principles gives you the power to maintain optimal performance for years to come.
Final Safety Disclaimer: Always turn off water at the main valve before attempting any plumbing repairs beyond shower head cleaning. If you’re unsure about any procedure, consult a professional. Water damage from DIY mistakes can cost thousands to repair. When in doubt, call a licensed plumber.