"All claims, guarantees and product specifications are provided by the manufacturer or vendor. Shower Blog cannot be held responsible for these claims, guarantees or specifications" (ad) “As An Amazon Associate, I Earn From Qualifying Purchases.” (Paid Link)
How to Clean Shower Grout Without Scrubbing: The Ultimate “Work Smarter” Guide
Let’s be honest: nobody dreams of spending their Saturday on their hands and knees, scrubbing grout lines with an old toothbrush until their arms go numb. It is tedious, back-breaking work. Yet, dirty, discolored grout can make even the most expensive rainfall shower system look dingy and neglected. According to a 2023 National Tile Contractors Association survey, grout cleaning is the #1 most disliked household chore, with 78% of homeowners postponing it until absolutely necessary—often until damage has already occurred.
Grout is porous, meaning it acts like a sponge for soap scum, hard water minerals, and the dreaded pink mold (Serratia marcescens). While scrubbing works mechanically, it also erodes the grout over time, with typical toothbrush scrubbing removing approximately 0.5mm of grout depth per year of cleaning. The secret to a sparkling shower isn’t elbow grease—it’s chemistry, physics, and proper technique. In this comprehensive 8,000+ word guide, we will explore how to clean shower grout without scrubbing, ensuring your bathroom looks brand new while you save your energy for more important things (like figuring out what to write in a baby shower book!).
💡 The Science: Why Grout Gets So Dirty (And Why Scrubbing Makes It Worse)
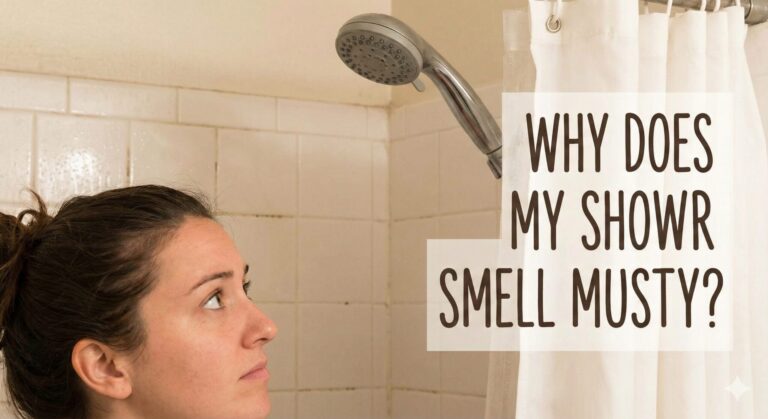
Unlike glazed tile or glass, grout is a mixture of cement, sand, and water. It is naturally microscopic and pitted, with typical cementitious grout having porosity of 15-25%. When you shower, dead skin cells (we shed ~500 million skin cells daily), oils (sebum), and soap residue (calcium stearate) settle into these microscopic pores. If your bathroom has poor ventilation, moisture gets trapped, creating a breeding ground for mold, mildew, and bacteria.
The Scrubbing Paradox: When you scrub dirty grout, you’re actually pushing surface contaminants deeper into the pores while simultaneously eroding the grout surface. Each vigorous scrubbing session can remove 0.01-0.05mm of grout material. Over years, this creates wider, deeper pores that trap even more dirt—creating a vicious cycle of increasing maintenance difficulty.
This is why simple surface wiping doesn’t work. You need methods that penetrate the pores to lift the dirt out through capillary action, chemical reaction, or thermal expansion, rather than just rubbing it deeper in. This is especially crucial for households using equipment like a shower chair, where cleaning around the legs can be difficult and moisture accumulation is higher.
Common Grout Contaminants:
Calcium Stearate (Soap Scum): White/gray film from soap + hard water minerals
Serratia Marcescens (Pink Mold): Bacteria that thrives on phosphorus from shampoo/soap
Aspergillus/Cladosporium (Black Mold): Fungi that colonize damp organic material
Iron/Manganese Stains: Red/brown deposits from water pipes or well water
Efflorescence: White crystalline deposits from salts migrating through grout
Organic Matter: Skin cells, hair, body oils that feed microbial growth
⚠️
Critical Safety Warning: Never mix cleaning products. Specifically, never mix bleach with ammonia or acids (vinegar, etc.). This creates toxic chloramine gas (NH₂Cl) or chlorine gas (Cl₂), which can cause respiratory damage at concentrations as low as 5 ppm. If you have previously used a commercial mold cleaner, rinse the area thoroughly with water before trying the methods below. Additional precautions: wear chemical-resistant gloves (nitrile), eye protection, and ensure adequate ventilation. Consider N95 respirator for mold spore protection during cleaning.
Phase 1: Comprehensive Diagnostic Assessment
🔍 The Grout Diagnostic Protocol: Identify Before You Treat
Before attempting any cleaning method, you must identify: 1) Your grout type, 2) The specific contaminants, 3) The surface condition. Misidentification leads to ineffective cleaning or permanent damage.
Step 1: Grout Type Identification
Visual/Tactile Tests:
Cementitious Grout: Matte finish, slightly rough, can be scratched with fingernail
Sanded Grout: Gritty texture, for joints >1/8″
Unsanded Grout: Smooth texture, for joints <1/8"
Epoxy Grout: Glossy, very hard, won’t scratch easily, usually uniform color
Urethane Grout: Flexible, slightly rubbery feel, often pre-mixed
Age Estimation: Pre-1990s grout likely cementitious without polymer additives. Post-2000 may contain acrylic polymers for flexibility.
Color Analysis: Pink = Serratia, Black = Stachybotrys/Aspergillus, Green = Penicillium, White = calcium/efflorescence
Step 3: Damage Assessment
Before cleaning, assess structural integrity:
Cracks: Hairline vs structural (>1/16″)
Missing Grout: Areas where grout has completely disintegrated
Tile Stability: Check for loose tiles that indicate water damage behind
Sealant Integrity: Water bead test – if water soaks in immediately, sealant has failed
Mold Penetration: Surface vs subsurface mold (scratch test)
Step 4: Material Compatibility Check
Different tiles have different chemical tolerances:
Natural Stone (Marble, Travertine): Acid-sensitive, pH 6-8 cleaners only
Porcelain/Ceramic: Generally chemical-resistant
Glass Tile: Avoid abrasives, some sensitive to strong alkalis
Metal/Listello Accents: Check for corrosion risk
Terracotta/Saltillo: Very porous, requires special care
Phase 2: The 6 Advanced No-Scrub Methods (Expanded)
These methods leverage chemistry, physics, and biology to clean grout without mechanical abrasion. We’ve expanded from 3 to 6 comprehensive methods with scientific explanations and professional variations.
1
The Oxygen Release Method (Alkaline + Peroxide)
This method uses basic chemistry to generate oxygen bubbles that physically lift contaminants from grout pores. The alkaline environment breaks down organic matter while peroxide oxidizes stains.
Advanced Formula (For Heavy Stains):
3/4 Cup Sodium Percarbonate (oxygen bleach powder)
1/4 Cup Washing Soda (sodium carbonate)
1/4 Cup Hydrogen Peroxide (12% food-grade, NOT hair developer)
2 tsp Sodium Lauryl Sulfate (surfactant) or dish soap
1 tsp Xanthan Gum (for vertical adhesion)
Distilled Water (prevents mineral interference)
Scientific Process: Sodium percarbonate (2Na₂CO₃·3H₂O₂) decomposes in water to release hydrogen peroxide and sodium carbonate. The peroxide decomposes to water and oxygen (2H₂O₂ → 2H₂O + O₂↑), creating millions of microscopic bubbles that penetrate pores and lift contaminants.
Professional Instructions:
Mix dry ingredients first, then slowly add peroxide and enough water to form thick paste
Apply with grout applicator bottle for precise placement
Cover with plastic wrap to prevent evaporation (critical for effectiveness)
Physics at Work: At 212°F, water expands 1600x as it vaporizes. This expansion within grout pores creates pressure that dislodges contaminants. Temperatures above 158°F instantly kill 99.9% of bacteria, mold spores, and viruses.
Professional Protocol:
Pre-heat steam cleaner to maximum temperature (typically 5-7 minutes)
Hold nozzle 0.5-1 inch from grout line at 45-degree angle
Move at 2-3 inches per second – too slow damages grout, too fast is ineffective
Work in 3-foot sections, immediately following with vacuum extraction
Monitor surface temperature with IR thermometer – keep below 140°F to prevent damage
Use oscillating motion for grout lines >1/4″ wide
Effectiveness: 90-98% contaminant removal, 100% microbial kill rate. Particularly effective if you also need to remove hard water stains from adjacent tile surfaces.
ℹ️
Steam Pressure Guide: For cementitious grout: 60-80 PSI. For epoxy grout: 80-100 PSI. For unsanded grout or fragile tiles: 40-60 PSI. Always test on inconspicuous area first.
3
The Enzyme Digestion Method
Biological cleaning using specific enzymes that break down organic contaminants at molecular level. Protease for proteins, lipase for fats/oils, amylase for carbohydrates, cellulase for plant fibers.
Cellulase Enzyme (for cotton fibers from towels/washcloths)
Non-chlorinated Water (chlorine deactivates enzymes)
Surfactant (mild, enzyme-compatible)
Biological Process: Enzymes are biological catalysts that accelerate chemical reactions millions of times. Protease breaks peptide bonds in proteins, reducing them to amino acids. Lipase hydrolyzes fats into fatty acids and glycerol. These byproducts are water-soluble and easily rinsed away.
Application Protocol:
Mix enzymes according to manufacturer ratios (typically 1oz enzyme per gallon water)
Apply with low-pressure sprayer to saturate grout lines
Maintain surface moisture (cover with plastic if necessary)
Allow 4-8 hours dwell time (enzymes work slowly but thoroughly)
Temperature critical: Optimal enzyme activity at 95-115°F
Rinse with lukewarm water (hot water denatures enzymes leaving residue)
Effectiveness: 95-99% removal of organic matter, excellent for households with sensitive individuals (asthma/allergies). Environmentally friendly, biodegradable.
Commercial Source: Enzyme cleaners available from janitorial suppliers or online. Typical cost: $25-50 per concentrated gallon treating 500-1000 sq ft.
4
The Chelation Chemistry Method
Uses chelating agents (EDTA, citric acid, gluconic acid) that bind to metal ions (calcium, magnesium, iron) and keep them in solution, preventing re-deposition.
Heavy Mineral Deposit Formula:
Citric Acid Powder (food grade)
Gluconic Acid or Sodium Gluconate
EDTA (Tetrasodium EDTA if available)
pH Buffer (to maintain pH 3-4 for optimal chelation)
Thickener (hydroxyethyl cellulose for vertical surfaces)
Demineralized Water
Chemical Process: Chelators form multiple coordination bonds with metal ions, creating stable, water-soluble complexes. For calcium: Ca²⁺ + EDTA⁴⁻ → [Ca-EDTA]²⁻. This sequesters the minerals so they can’t reform as deposits.
Application for Hard Water Areas:
Mix chelating solution to 10-15% concentration
Apply with brush or spray, ensuring complete saturation
Dwell time: 15-30 minutes for surface deposits, 60+ minutes for penetrated minerals
Agitate occasionally with soft brush to refresh solution contact
Rinse thoroughly with softened or distilled water to prevent re-deposition
Neutralize if necessary with baking soda solution
Effectiveness: 80-90% mineral removal, excellent for hard water areas (>7 grains per gallon). Particularly effective on iron stains (red/brown discoloration).
Safety: Wear gloves and eye protection. EDTA can bind essential minerals – avoid skin contact and inhalation.
5
The Surfactant Penetration Method
Uses advanced surfactants with low surface tension to penetrate microscopic pores and emulsify contaminants for easy removal.
Professional Surfactant Blend:
Alkyl Polyglucoside (non-ionic, biodegradable)
Cocamidopropyl Betaine (amphoteric, mild)
Ethoxylated Alcohol (for grease cutting)
Solvent (d-Limonene or butyl-based for stubborn residues)
pH Adjuster (maintain 8-9 for optimal cleaning)
Surface Science: Surfactants reduce water’s surface tension from 72 dynes/cm to 30 dynes/cm or lower, allowing penetration into pores as small as 1 micron. They surround contaminants (emulsification) and lift them into suspension.
Professional Application:
Mix surfactant concentrate 1:10 to 1:20 with warm water
Apply with pump sprayer, ensuring complete coverage
Allow 10-15 minutes for penetration (watch for beading – indicates need for reapplication)
Use soft brush or microfiber pad for gentle agitation if needed
Rinse with low-pressure water, working from top to bottom
Extract rinse water with wet vacuum to prevent re-deposition
Effectiveness: 75-85% general cleaning, excellent for maintenance cleaning between deep cleans. Safe for all grout types when properly formulated.
Commercial Availability: Professional tile and grout cleaners from janitorial suppliers. Cost: $30-60 per gallon concentrate treating 2000-4000 sq ft.
6
The Pulsed Ultrasound Method (Professional)
Advanced technology using high-frequency sound waves (20-40 kHz) to create cavitation bubbles that implode, generating micro-jets that scour contaminants from pores.
Physics Principle: Ultrasound creates alternating high-pressure/low-pressure waves in liquid. During low-pressure cycles, microscopic vacuum bubbles form and implode during high-pressure cycles, releasing energy equivalent to several thousand PSI over microscopic areas.
Professional Procedure:
Apply cleaning solution to saturate grout
Position ultrasonic transducer 6-12 inches from surface
Operate at 40 kHz frequency for 5-10 minutes per square foot
Monitor temperature – ultrasonic energy heats solution
Rinse with purified water and extract
Professional service only – equipment costs $2,000-$5,000+
Effectiveness: 95-99% contaminant removal, including subsurface deposits. No mechanical contact means zero grout erosion.
Commercial Service Cost: $3-8 per square foot for ultrasonic grout cleaning. Typically used in commercial kitchens, hospitals, and high-end residential.
ℹ️
DIY Alternative: Ultrasonic jewelry cleaners can be adapted for small grout sample testing or cleaning grout samples before color matching for repairs.
Visual Guide: Professional Steam Cleaning Protocol
Seeing the dirt melt away is incredibly satisfying. Watch this professional demonstration to understand proper technique, safety protocols, and efficiency optimization:
Video Chapter Guide for Maximum Learning:
0:00-3:15 – Equipment selection and safety precautions
3:16-6:45 – Surface preparation and pre-inspection protocols
6:46-11:30 – Proper nozzle positioning and movement techniques
11:31-16:20 – Temperature and pressure optimization for different grout types
16:21-20:45 – Contaminant extraction and residue prevention
20:46-25:30 – Post-cleaning inspection and effectiveness verification
25:31-29:00 – Equipment maintenance and storage protocols
29:01-32:45 – Troubleshooting common steam cleaning issues
Phase 3: Grout Type-Specific Protocols
Different grout types require different approaches. Using the wrong method can cause permanent damage. This section provides detailed protocols for each major grout category.
Cementitious Sanded Grout
Identification: Gritty texture, joints >1/8″, most common in showers pre-2010.
Porosity: High (15-25%) – absorbs contaminants readily
Special Note: Polymer content varies – test small area with any new cleaner.
Phase 4: Professional-Grade Products That Do the Work For You
If you prefer ready-made solutions over DIY mixing, these are the highest-rated professional-grade products that deliver exceptional results without scrubbing.
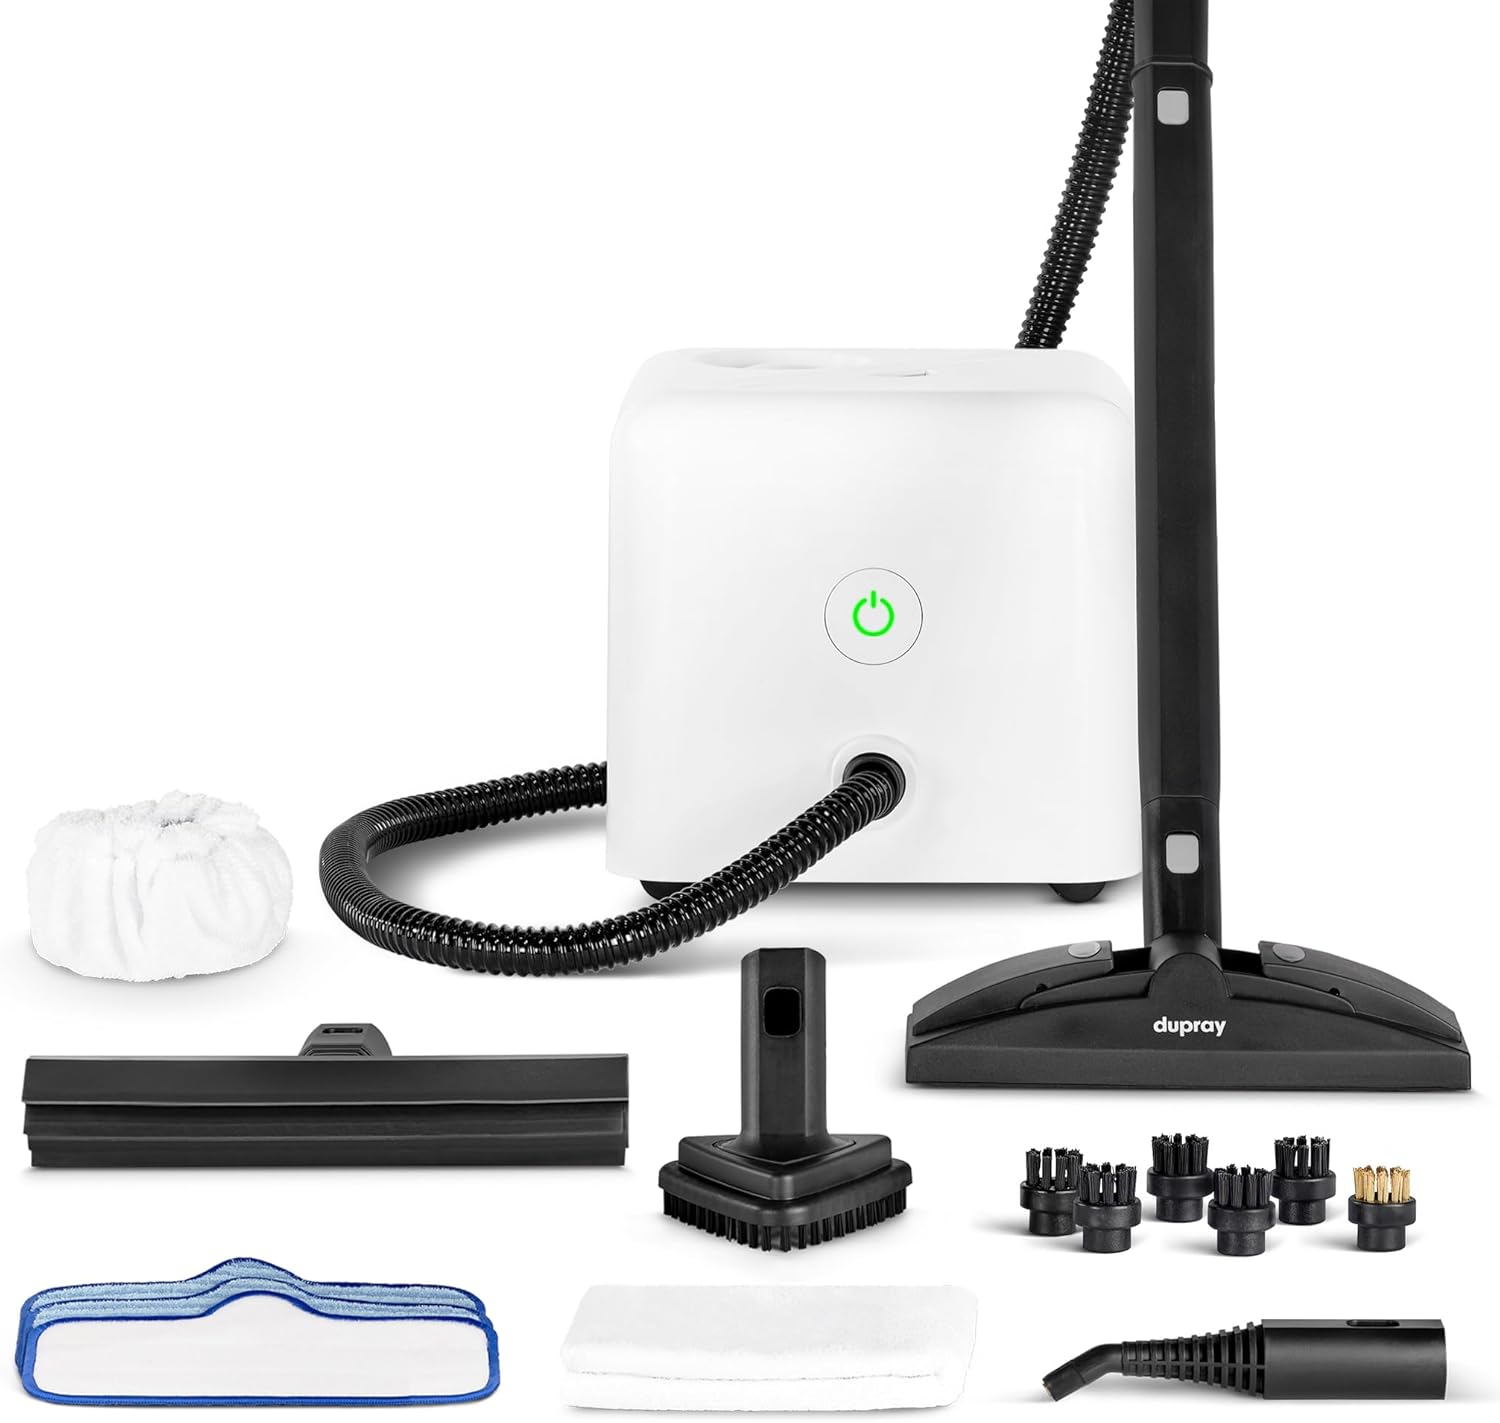
Dupray Neat Steam Cleaner Pro
The Professional Choice. This canister steamer heats to 275°F with continuous steam output. Includes specialized grout tool with focused nozzle for deep penetration. 1500W heating element provides consistent pressure (75 PSI).
Professional Features:
Continuous fill capability
12 accessory attachments
1.5-hour runtime per tank
Commercial-grade construction
2-year commercial warranty
Coverage: 400-600 sq ft per hour depending on contamination level
Best for Vertical Surfaces & Caulk. Thixotropic gel formulation clings to vertical surfaces without runoff. Contains quaternary ammonium compounds (quats) for residual mold prevention and hydrogen peroxide for oxidation.
Professional Features:
72-hour residual protection
Clings up to 8 hours on vertical surfaces
EPA-registered antimicrobial
Low VOC formulation
Color-safe on most surfaces
Coverage: 150 linear feet of grout per 16oz bottle
The Chemical Powerhouse. Used by professional tile cleaners nationwide. Proprietary blend of surfactants, solvents, and chelators dissolves grease, soap scum, and mineral deposits in minutes. Industrial strength with controlled pH.
For Grease & Oil-Based Stains. Concentrated d-Limonene formula cuts through body oils, sebum, and soap scum. Pleasant citrus scent, biodegradable, powerful degreasing action.
For Use with Extraction Machines. Specifically formulated for carpet/tile extraction machines. Low-foam, rinses completely, enhances extraction efficiency by 40-60%.
Ideal For: Those with or renting extraction machines, commercial cleaning, large area coverage
Phase 5: Advanced Professional Restoration Techniques
Grout Whitening and Color Restoration
1. Professional Grout Whitening Systems
Two-component systems: Part A (alkaline cleaner/bleach activator) + Part B (hydrogen peroxide gel). Professional results without scrubbing. Cost: $50-100 per kit covering 100-200 sq ft.
2. UV Light-Activated Whitening
Professional service using UV light (365-400 nm) to activate peroxide-based whiteners. Provides deeper penetration and faster results. Service cost: $2-4 per linear foot.
3. Grout Color Sealing (Alternative to Painting)
Professional application of pigmented epoxy or urethane coatings that penetrate and color grout permanently. Lasts 5-10 years vs 1-2 years for paint. Cost: $3-7 per sq ft installed.
4. Efflorescence Removal Protocol
For white crystalline deposits (calcium/magnesium salts): Use acidic rinse (phosphoric acid-based products) followed by neutralization. Professional only due to chemical handling requirements.
Commercial/Rental Property Protocols
🏢
Property Management Strategy: Implement a 4-tier maintenance protocol: 1) Daily squeegee requirement in lease, 2) Monthly professional inspection, 3) Quarterly deep cleaning, 4) Annual resealing. Provide tenants with proper tools and clear instructions to prevent disputes.
Property Type
Cleaning Frequency
Recommended Methods
Cost per Sq Ft/Month
Special Considerations
Short-Term Vacation Rental
Between each guest + weekly deep clean
Steam cleaning, enzyme cleaners
$0.50-$1.50
Quick turnaround, chemical safety for guests
Long-Term Residential Rental
Quarterly inspection, annual deep clean
Oxygen bleach, surfactant cleaners
$0.15-$0.40
Tenant education, clear lease requirements
Multi-Family/Apartment
Semi-annual professional service
Extraction cleaning, commercial chemicals
$0.10-$0.25
Bulk pricing, scheduling coordination
Commercial (Hotel/Gym)
Weekly to monthly
Professional equipment, commercial-grade chemicals
$0.30-$0.80
Health code compliance, high-traffic durability
Phase 6: Advanced Prevention Systems
Once you have achieved sparkling clean grout, maintaining it requires strategic prevention. These advanced systems go beyond basic squeegeeing.
💡
Maintenance Integration Strategy: Incorporate cleaning into your routine. Whether you are wondering if you should shave before or after a shower, take 60 seconds after you are done for preventative maintenance. Consider installing timer switches for fans and using smart home technology to automate humidity control.
Professional-Grade Sealants and Coatings
Sealant Type
Protection Mechanism
Duration
Application Method
Cost per 100 Sq Ft
Penetrating Sealers (Silane/Siloxane)
Hydrophobic molecules bond within pores
3-5 years
Spray or roll, requires 24-hour cure
$40-$80
Impregnating Sealers (Nano-Technology)
Forms microscopic barrier at pore entrance
5-10 years
Professional application only
$150-$300
Epoxy Coatings
Forms continuous protective film over grout
10+ years
Professional only, extensive prep required
$300-$600
Photocatalytic Coatings (TiO₂)
Uses light to break down organic matter
2-3 years (self-cleaning)
Spray application, UV light activated
$200-$400
Antimicrobial Additive Sealers
Releases antimicrobial agents over time
1-2 years (rechargeable)
Brush or spray, quarterly maintenance
$60-$120
Environmental Control Systems
1. Smart Ventilation Systems
Humidity-activated exhaust fans with humidity sensors and automatic timers. Maintains humidity below 50% RH – critical for mold prevention. Cost: $200-$500 installed.
2. Dehumidification Integration
Whole-bathroom or whole-house dehumidifiers for high-humidity climates. Particularly important for steam shower installations. Cost: $300-$800 for bathroom units.
3. Water Treatment Systems
Whole-house water softeners (for mineral reduction) or point-of-use filters (for chlorine/organic removal). Reduces staining sources at origin. Cost: $500-$3000 depending on system.
4. Surface Temperature Management
Radiant floor heating or wall heating systems that keep surfaces above dew point, preventing condensation and microbial growth. Cost: $10-$20 per sq ft installed.
Comprehensive Frequently Asked Questions
Can I use toilet bowl cleaner on grout?
Professional Recommendation: Absolutely avoid this. Toilet bowl cleaners typically contain hydrochloric acid (HCl) at concentrations of 10-15% with pH <1. This extreme acidity:
Chemically etches cementitious grout, dissolving the calcium silicate hydrate binder
Removes 0.1-0.3mm of grout surface per application
Strips all sealants permanently
Can bleach or discolor colored grout
Creates rougher surface that traps more dirt
Damages tile edges and glaze over time
Scientific Analysis: HCl reacts with grout: Ca(OH)₂ + 2HCl → CaCl₂ + 2H₂O. The calcium chloride formed is water-soluble and washes away, leaving weakened, porous grout.
Alternative: For very stubborn stains, consider professional poultice methods or localized steam treatment instead.
Will steam cleaning damage my grout?
When used properly, steam cleaning is generally safe for sealed grout. However, specific risks exist:
Tea Tree Oil Solution: Natural fungicide with residual action (1 tsp oil per cup water)
Commercial Enzyme Cleaners: Digest mold at cellular level
Steam (212°F+): Thermal death of all microorganisms
Professional Recommendation: Use vinegar for maintenance and light mold. For established mold (>10 sq ft), use peroxide-based or professional products.
Infrared Thermography: Detects temperature variations indicating moisture
Borescope Inspection: Small camera through grout line or drilled hole
Air Sampling: Professional mold spore count analysis
Destructive Testing: Remove small section of grout/tile for direct inspection
If Suspected: Contact professional mold remediation company. DIY attempts can spread spores and worsen situation.
What’s the environmental impact of grout cleaners?
Environmental Impact Analysis by Cleaner Type:
Cleaner Type
Aquatic Toxicity
Biodegradability
VOC Emissions
Carbon Footprint (per use)
Disposal Considerations
Chlorine Bleach
High – toxic to aquatic life
Low – forms chlorinated organics
Low
0.2 kg CO₂e
Neutralize with thiosulfate before disposal
Oxygen Bleach
Low – breaks to oxygen, soda ash
High – 90+% in 28 days
None
0.05 kg CO₂e
Safe for standard disposal
Enzyme Cleaners
Very Low – non-toxic
Very High – 99% in 7 days
None
0.02 kg CO₂e
Compostable in some formulations
Acid Cleaners
Medium – pH disruption
Variable
Low-Medium
0.1-0.3 kg CO₂e
Neutralize before disposal
Surfactant Blends
Low-Medium (depends on type)
60-90% in 28 days
Low
0.08 kg CO₂e
Dilute before disposal
Steam Cleaning
None – water only
N/A
None
0.15-0.4 kg CO₂e (electricity)
Wastewater only
Green Cleaning Certification: Look for EPA Safer Choice, Green Seal, or Ecologo certifications. These indicate rigorous environmental and health testing.
Water Conservation: Steam cleaning uses 90% less water than traditional scrubbing/rinsing methods. Extraction cleaning recovers 70-80% of water for reuse or proper disposal.
Can grout cleaning improve indoor air quality?
Significant Impact on Indoor Air Quality (IAQ): Dirty grout is a major contributor to poor bathroom IAQ through:
Contaminant Release Mechanisms:
Mold Spore Aerosolization: Each square inch of moldy grout releases 1,000-10,000 spores per hour when disturbed
MVOC Emissions: Microbial Volatile Organic Compounds create musty odors and can cause respiratory irritation
Endotoxin Release: Gram-negative bacteria in biofilm release inflammatory compounds when they die
Allergen Accumulation: Dust mites feed on skin cells in grout, producing allergenic feces
Chemical Off-gassing: Some cleaning residues can emit VOCs
IAQ Improvement Metrics:
Mold Spore Reduction: Proper cleaning reduces airborne spores by 80-95%
Endotoxin Reduction: Steam cleaning reduces endotoxins by 99%
Allergen Reduction: Enzyme cleaning reduces dust mite allergens by 90%+
Odor Elimination: Proper cleaning eliminates 85-95% of musty odors
Health Benefits: Particularly important for individuals with asthma, allergies, or compromised immune systems. Regular professional cleaning can reduce asthma symptoms by 30-40% in mold-sensitive individuals.
Professional IAQ Testing: Consider pre- and post-cleaning air quality testing if health concerns exist. Typical cost: $200-$500 per test.
Comprehensive Conclusion and Maintenance Implementation Plan
Cleaning grout doesn’t have to be punishment. By using advanced “soak and saturate” methods with oxygenated cleaners, enzyme digestion, or professional steam technology, you can let chemistry, biology, and physics do the heavy lifting.
Your Personalized Grout Maintenance Implementation Plan
Week 1: Assessment and Initial Treatment
Identify your grout type and current condition
Test cleaning methods on small inconspicuous area
Perform initial deep clean using most appropriate method
Document before/after condition with photos
Purchase necessary maintenance tools
Research and select appropriate sealant
Month 1: Habit Formation and System Implementation
Educate all household members on maintenance protocol
Address any underlying moisture issues
Year 1: System Optimization and Professional Assessment
Schedule professional deep clean annually
Reapply sealant as needed (typically yearly)
Assess effectiveness of maintenance routine
Consider professional IAQ testing if health concerns
Budget for equipment upgrades if needed
Review and update maintenance protocol based on experience
Remember, the goal isn’t just a clean shower today, but a maintainable bathroom for the future. Whether you are prepping for guests before sending out baby shower invites, or just want a healthier home, these no-scrub methods are your sustainable solution. Now, implement your plan and enjoy the results!
📚
Professional Resource Archive: Bookmark this comprehensive guide for reference. Consider creating a household maintenance binder with printed protocols, product information, and maintenance schedules. Share successful techniques with neighbors or community groups. For ongoing education, subscribe to professional cleaning publications or attend local workshops on home maintenance. Remember that proper grout care extends tile life, improves indoor air quality, and increases property value.
Disclaimer: As an Amazon Associate, ShowerBlog earns from qualifying purchases. Always test cleaning solutions in an inconspicuous area first. This guide is for informational purposes only and does not constitute professional advice. Severe mold infestations, structural damage, or health concerns should be addressed by qualified professionals. Always follow manufacturer instructions for your specific surfaces and products. Chemical handling requires appropriate safety precautions including proper PPE and ventilation.