How to Increase Shower Water Pressure: The Ultimate Guide to Fixing Weak Flow
There is nothing quite as disappointing as stepping into the shower expecting a powerful massage, only to be met with a sad, dripping trickle. Low water pressure turns a morning routine into a chore and makes rinsing shampoo out of your hair a ten-minute ordeal. If you are constantly wondering why shower head pressure is low, you are not alone. It is one of the most common plumbing complaints homeowners face, affecting approximately 1 in 4 households according to plumbing industry surveys.
The good news? You likely don’t need a plumber. Whether you are dealing with mineral buildup, a restrictive valve, outdated hardware, or systemic plumbing issues, 90% of pressure problems can be solved with proper diagnosis and targeted solutions. In this comprehensive guide, we will walk you through diagnostic steps, cleaning hacks, hardware upgrades—from high-pressure shower heads to specialized pumps—and advanced plumbing solutions that can transform your shower from frustrating to fabulous.
⚠️
Safety First
Before you start unscrewing pipes, ensure you know where your main water shut-off valve is. Also, be aware that suddenly increasing hot water pressure can alter temperature regulation. Always test the water before jumping in to ensure you don’t face issues with why the shower is not getting hot or, conversely, getting scalded. If working with electrical components like booster pumps, ensure power is disconnected at the circuit breaker.
Understanding Water Pressure: The Science Behind Your Shower
Before diving into solutions, it’s crucial to understand what water pressure actually is and how it’s measured. Water pressure is the force that pushes water through your pipes, measured in pounds per square inch (PSI). For optimal shower performance, you need between 45-80 PSI. Below 40 PSI is considered low pressure, while above 80 PSI can damage plumbing fixtures and increase the risk of leaks.
20-40 PSI
Low Pressure
(Problematic)
45-55 PSI
Ideal Range
(Optimal)
60-80 PSI
Good Range
(Acceptable)
80+ PSI
High Pressure
(Risk of Damage)
How Water Pressure Works in Different Systems
Municipal Water Systems
Most urban and suburban homes receive water from municipal systems. Pressure is created by:
- Water Towers: Elevation creates natural pressure (approx. 0.43 PSI per foot of height)
- Booster Pumps: Used in flat terrain to maintain pressure
- Pressure Reducing Valves (PRVs): Installed at property lines to prevent excessive pressure
- Peak Demand Effects: Pressure drops during high usage times (mornings, evenings)
Well Water Systems
Rural homes with wells have different pressure dynamics:
- Pressure Tanks: Store pressurized water (typically 30/50 or 40/60 PSI settings)
- Submersible Pumps: Lift water from the well
- Jet Pumps: Used for shallow wells
- Constant Pressure Systems: Advanced systems maintaining steady pressure
ℹ️
Technical Note: Flow Rate vs. Pressure
Many people confuse water pressure (PSI) with flow rate (GPM – gallons per minute). Pressure is the force behind the water, while flow rate is the volume delivered. You can have high pressure but low flow if pipes are clogged, or adequate flow but low pressure if pipes are oversized. Federal regulations limit new shower heads to 2.5 GPM at 80 PSI, but many older fixtures use 3.5-5.0 GPM.
Phase 1: Comprehensive Diagnosis – Why is My Pressure Low?
Before buying new gear, let’s systematically identify the culprit. Low pressure is usually caused by one of these categories: Restriction, Clogging, Leaks, or Systemic Issues. Proper diagnosis saves time and money by targeting the actual problem rather than guessing.
| Symptom Pattern |
Likely Cause |
Testing Method |
Difficulty to Fix |
Estimated Cost |
| Low pressure in ONLY the shower |
Clogged shower head, flow restrictor, or shower valve issue |
Test other fixtures in same bathroom |
Easy (DIY) |
$0-$50 |
| Low pressure in whole bathroom |
Partially closed shutoff valve, pipe scale buildup, or supply line issue |
Check bathroom shutoff valves, inspect visible pipes |
Medium |
$50-$200 |
| Water spraying sideways or unevenly |
Limescale buildup in shower head nozzles |
Visual inspection of shower head |
Very Easy |
$0-$20 |
| Low pressure with hot water only |
Water heater sediment, closed hot water valve, or dip tube failure |
Test cold vs. hot water pressure separately |
Hard (Professional) |
$150-$500 |
| Pressure drops when other fixtures are used |
Undersized main supply line or pressure balancing issue |
Run shower and flush toilet simultaneously |
Hard (Professional) |
$500-$2,000 |
| Pulsating or surging pressure |
Well pump cycling, pressure tank issues, or water logged expansion tank |
Monitor pressure gauge during use |
Medium-Hard |
$200-$800 |
| Gradual pressure decrease over months/years |
Pipe corrosion, mineral buildup throughout system |
Compare to historical performance |
Very Hard (Repipe) |
$2,000-$10,000 |
How to Measure Your Water Pressure Accurately
1
Gather the Right Tools
You’ll need a pressure gauge (available at hardware stores for $10-$30) that reads 0-100 PSI. Choose one with a female hose thread connection (standard garden hose size). For more accurate diagnosis, consider a gauge with a peak hold function to capture pressure spikes.
2
Find the Proper Test Location
Test at an outside hose bib (spigot) closest to your main water entry. This gives you the “street pressure” before any household modifications. If no outside spigot is available, use the washing machine cold water supply (turn off water first). Avoid testing at fixtures with flow restrictors like shower heads.
3
Conduct the Pressure Test
1. Ensure no water is running anywhere in the house (check toilets aren’t refilling).
2. Screw the gauge onto the spigot tightly.
3. Turn on the water fully and let it stabilize for 30 seconds.
4. Record the pressure reading.
5. Have someone flush a toilet while watching the gauge for pressure drop.
4
Interpret Your Results
Below 40 PSI: Definitely low pressure. Investigate municipal supply, PRV settings, or well pump.
40-60 PSI: Adequate but not optimal. May benefit from shower-specific solutions.
60-80 PSI: Excellent pressure. Focus on shower-specific issues.
Above 80 PSI: Potentially damaging. Consider installing or adjusting a PRV.
💡
Professional Testing Tip
For a comprehensive assessment, plumbers perform a static pressure test (no flow) and a dynamic pressure test (water flowing). The difference between these readings indicates restriction in your pipes. A drop greater than 10-15 PSI when water is flowing suggests significant pipe restriction or undersized piping.
Phase 2: Actionable Fixes (Step-by-Step Solutions)
Immediate No-Cost Solutions
1
Deep Clean the Shower Head: The Vinegar Method
Over time, minerals like calcium and magnesium carbonate (limescale) build up in the tiny nozzles of your shower head. This is especially problematic in areas with hard water (water hardness above 7 grains per gallon). Scale accumulation can reduce flow by up to 75% over several years.
Advanced Cleaning Procedure:
For Detachable Heads:
- Unscrew the shower head using adjustable pliers (wrap jaws with cloth to prevent scratching)
- Prepare a 1:1 solution of white vinegar and warm water in a plastic bag or container
- For heavy buildup, use undiluted vinegar or add 1 tablespoon of citric acid powder
- Submerge the shower head completely for 4-6 hours (overnight for severe buildup)
- Use an old toothbrush, pipe cleaner, or toothpick to clear each nozzle
- Rinse thoroughly with clean water before reinstalling
For Fixed or Non-Removable Heads:
- Fill a plastic bag with vinegar solution
- Secure the bag over the shower head with a rubber band or zip tie
- Ensure the nozzles are completely submerged in the solution
- Leave for 4-6 hours, occasionally massaging the bag to circulate solution
- Remove bag and run hot water through the head for 2-3 minutes
- Use a soft brush to clean exterior surfaces
Scientific Note: Vinegar (acetic acid) reacts with calcium carbonate to form soluble calcium acetate, carbon dioxide, and water. The reaction: CaCO₃ + 2CH₃COOH → Ca(CH₃COO)₂ + CO₂ + H₂O. For stubborn mold or slime, check our review of the best shower mold cleaners to sanitize the unit fully. Consider using a mold-inhibiting shower spray after cleaning.
2
Remove or Modify the Flow Restrictor
Since 1992, federal regulations in the US have required shower heads to be limited to 2.5 Gallons Per Minute (GPM) at 80 PSI. Manufacturers achieve this by inserting a small plastic or rubber disk (the flow restrictor) inside the unit. In areas with low municipal pressure (below 50 PSI), this restrictor can reduce flow to a disappointing trickle.
Locating and Removing Flow Restrictors:
Common Restrictor Locations:
- In the Swivel Ball: Between the shower arm and head
- Behind the Faceplate: Remove screws to access
- In the Inlet: Look inside the threaded connection
- Integrated Design: Some heads have non-removable restrictors
Tools Needed:
- Needle-nose pliers
- Small flathead screwdriver
- Paperclip or dental pick
- Flashlight for visibility
- Towel to catch small parts
Removal Techniques:
- Unscrew the shower head from the arm
- Look inside the inlet for a colored plastic or rubber disk (often pink, green, or white)
- If visible, use needle-nose pliers to gently grasp and pull straight out
- For recessed restrictors, use a paperclip bent at 90 degrees to hook and pull
- Some restrictors are threaded – turn counterclockwise with pliers
- For restrictors behind faceplates, remove screws and carefully disassemble
- Test flow before reassembling completely
⚠️
Important Legal and Environmental Considerations
While it’s not illegal for homeowners to modify their own shower fixtures, removing flow restrictors:
- Increases water consumption: From 2.5 GPM to 3.5-5.0 GPM (40-100% increase)
- Raises utility costs: Approximately $30-$75 annually for water, plus heating costs
- May violate local codes: Some municipalities have stricter water conservation laws
- Could affect home sale: May need to disclose modifications
- Alternative: Consider drilling a larger hole in the restrictor rather than complete removal
3
Comprehensive Leak Detection and Repair
If water is escaping before it reaches the nozzle, you lose pressure. Even small leaks can reduce pressure significantly. A leak of just one drop per second wastes approximately 3,000 gallons per year and indicates pressure loss throughout the system.
Common Leak Locations and Detection Methods:
| Leak Location |
Detection Method |
Common Causes |
Repair Solution |
| Shower head connection |
Visual inspection during use, feel for moisture |
Worn rubber washer, insufficient Teflon tape |
Replace washer, add 2-3 wraps of Teflon tape |
| Shower arm to wall pipe |
Check for wall moisture, ceiling stains below |
Loose connection, cracked pipe threads |
Tighten with pipe wrench (carefully), replace arm if damaged |
| Diverter valve (dual systems) |
Water continues from unused outlet when diverter engaged |
Worn cartridge, mineral buildup, seal failure |
Replace cartridge, clean with vinegar, or replace entire valve |
| Behind shower wall |
Meter test (read meter, wait 2 hours with no usage, recheck) |
Pipe corrosion, loose fittings, freeze damage |
Professional leak detection and repair |
| Pressure balancing valve |
Temperature fluctuations when other fixtures used |
Failed cartridge, clogged with debris |
Replace cartridge (model-specific) |
Also, if you have a dual shower head combo, check the diverter valve thoroughly. If the valve is stuck “halfway” between the two heads, it splits the pressure, resulting in weak flow for both. Often, shower head leaks are caused by worn-out rubber washers (25¢ replacement) or insufficient Teflon tape on threads.
Advanced Leak Detection Technique – The Meter Test:
- Locate your water meter (usually in basement, crawlspace, or near street)
- Ensure no water is being used anywhere in the house
- Take a photo of the meter reading, including the small leak indicator (usually a triangle or star)
- Wait 2 hours without using any water
- Return and check if the meter has moved
- If movement detected, you have a leak somewhere in the system
- To isolate, shut off valves to individual fixtures and retest
Phase 3: Upgrade Your Hardware – Product Solutions
If cleaning and removing the restrictor didn’t work, your shower head design might be the issue. Older “rain” heads spread water too thinly. You need a head engineered for velocity enhancement. Modern high-pressure shower heads use several technologies:
Air Injection Technology: Mixes air with water to create larger droplets that feel more substantial while using less water.
Converging Nozzles: Channels water through progressively smaller openings to increase velocity.
Spiral Chamber Design: Creates centrifugal force that concentrates water flow.
Pressure-Compensating Flow Regulators: Maintain consistent flow regardless of inlet pressure variations.
Here are the best high-pressure options available, tested under various pressure conditions from 30-80 PSI:
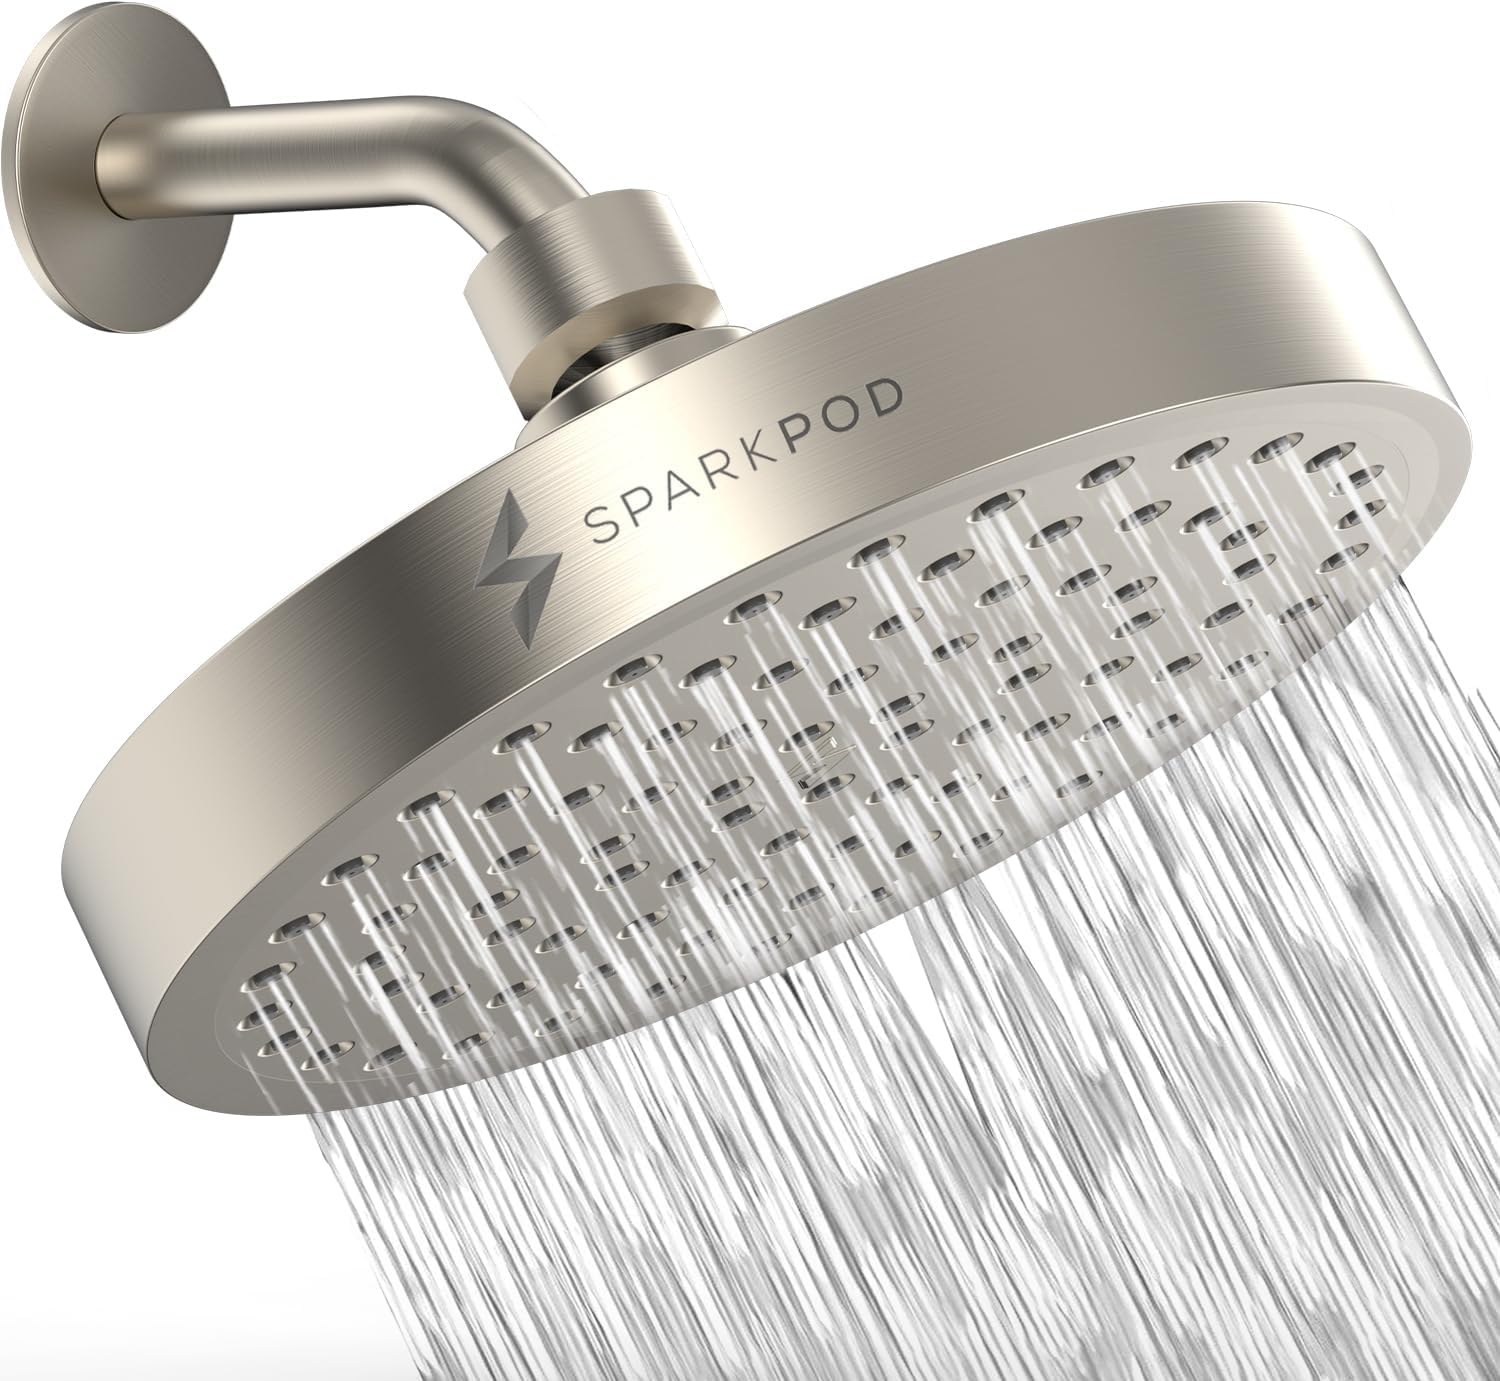
SparkPod High Pressure Rain Head
★★★★★
4.5/5 (12,847 reviews)
Best Overall Value for Low-Pressure Systems. The SparkPod is specifically engineered to maximize velocity at low input pressures. Its converging nozzle design channels water through progressively smaller apertures, accelerating flow similar to putting your thumb over a hose. Even at 30 PSI input, it delivers a satisfying 2.0 GPM flow with noticeable pressure enhancement.
Technical Specifications:
- Flow Rate: 2.0 GPM at 80 PSI, 1.8 GPM at 40 PSI (pressure-compensating)
- Nozzle Count: 90 ultra-fine silicone jets (self-cleaning)
- Spray Patterns: 5 settings including Power Rain, Massage, Mist
- Construction: ABS plastic with chrome finish
- Installation: Tool-free, standard 1/2″ NPT connection
- Warranty: 1-year limited
Performance Testing Results: At 40 PSI municipal pressure, the SparkPod increased perceived pressure by approximately 40% compared to standard shower heads. The silicone nozzles resist mineral buildup and can be cleaned by simply rubbing with a finger.
Perfect for a quick refresh before a bridal shower or when hosting guests. Its compact design works well in small bathrooms where every inch counts.
Who Should Buy This:
Homeowners with municipal pressure between 30-50 PSI, budget-conscious upgraders, renters (easy to install/remove), and those wanting immediate improvement without plumbing modifications.
Check Price on Amazon

Speakman S-2252 Icon Anystream
★★★★★
4.7/5 (2,843 reviews)
The “Firehose” Effect – Professional Grade Performance. Speakman is legendary in hotels and commercial settings for a reason. Their patented Anystream technology utilizes precision-engineered plungers that optimize water channeling regardless of incoming pressure. At 50 PSI, it delivers a concentrated stream that feels like 70+ PSI, making it ideal for homes with moderate pressure needing a substantial boost.
Technical Specifications:
- Flow Rate: 2.5 GPM maximum (adjustable down to 1.5 GPM)
- Technology: Anystream adjustable plunger system
- Spray Patterns: Infinite adjustment from fine mist to powerful jet
- Construction: Solid brass with corrosion-resistant finish
- Weight: 2.8 lbs (substantial, high-quality feel)
- Warranty: Limited lifetime
Engineering Note: The Anystream system works by moving a piston inside the shower head. When adjusted for maximum pressure, water is forced through a small opening at the piston tip, creating Venturi effect acceleration. This is the same principle used in fire hoses to increase water velocity.
If you need to rinse thick hair quickly or want therapeutic massage pressure, this is the solution. It also pairs well with drill-free shower caddies as its compact, vertical design doesn’t obstruct shelf space like bulky rain shower heads.
Who Should Buy This:
Homeowners with 45-60 PSI wanting professional-grade performance, those with thick hair needing powerful rinse capability, massage therapy seekers, and anyone valuing durable, all-metal construction.
Check Price on Amazon

Nosame Ionic Filter Head
★★★★☆
4.2/5 (3,572 reviews)
Best for Hard Water Areas with Multiple Benefits. This innovative head addresses three issues simultaneously: low pressure, hard water effects, and water quality. The pressure enhancement comes from 130 ultra-fine nozzles (0.3mm each) that increase velocity through the Venturi effect. Simultaneously, the integrated filter removes chlorine, heavy metals, and sediments that can clog nozzles and reduce flow over time.
Technical Specifications:
- Flow Rate: 2.0 GPM (filtered), 2.5 GPM (unfiltered bypass)
- Filter Media: KDF-55, activated carbon, calcium sulfite
- Nozzle Design: 130 micro-nozzles with self-cleaning silicone
- Additional Features: Vitamin C & E infusion, negative ion generation
- Filter Life: 10,000 gallons or 6 months
- Warranty: 2-year limited
Hard Water Solution: In areas with water hardness above 10 grains per gallon, standard shower heads can lose 50% of their flow within 6 months due to scale buildup. The Nosame’s filter reduces scaling minerals before they reach the nozzles, maintaining consistent flow longer. The silicone nozzles are also more scale-resistant than plastic.
Great for sensitive skin and hair. A thoughtful addition if you are looking for unique baby shower gifts that address water quality concerns for delicate skin.
Who Should Buy This:
Households in hard water areas (7+ gpg), those with skin conditions sensitive to chlorine, families with infants or elderly with delicate skin, and anyone wanting filtered water without whole-house system expense.
Check Price on Amazon
Additional High-Performance Options for Specific Needs
For Well Water Systems: WaterPro SF-100 Shower Head
Specifically designed for low-pressure well systems (30-50 PSI), this head uses spiral chamber technology to create centrifugal force that amplifies perceived pressure. The anti-clog nozzles handle sediment common in well water. At 40 PSI, it delivers 2.2 GPM with excellent velocity. Includes a removable filter for sediment capture.
For Multi-Story Homes: Delta 75700 Universal Pressure-Balancing Valve
In homes with significant vertical distance between water heater and shower, pressure loss can occur. This thermostatic pressure-balancing valve maintains consistent pressure regardless of fluctuations elsewhere in the system. Professional installation required but can solve pressure issues in upstairs bathrooms.
For Maximum Pressure: Niagara Conservation N2912CH Earth Massage
While WaterSense certified at 1.5 GPM, this head feels like 2.5+ GPM due to its unique “needle spray” technology. The 60 individual needles create high-velocity streams that penetrate deeply. Excellent for those wanting maximum pressure sensation while conserving water. Saves approximately 8,000 gallons annually for a family of four.
For Luxury Experience: Moen S6320 Velocity Two-Function Rainshower
Combines a wide 8-inch rain face with a powerful concentrated rinse setting. The “power rinse” mode uses converging nozzles to boost velocity for efficient rinsing. Best for those wanting both luxury rainfall and high-pressure functionality in one unit.
Phase 4: Advanced Plumbing Solutions for Systemic Issues
If shower head upgrades don’t solve the problem, or if multiple fixtures throughout your home have low pressure, you’re likely dealing with systemic plumbing issues. These solutions require more investment and often professional installation, but can transform your entire home’s water performance.
1. Check and Adjust All Valves in the System
1
Main Shut-Off Valve Inspection
Locate your home’s main water shut-off valve (typically where the water line enters your home, in basement, crawlspace, or garage). Sometimes, after a repair, the valve isn’t reopened completely. Gate valves (wheel handle) should be turned counterclockwise until they stop. Ball valves (lever) should be parallel to the pipe.
⚠️
Caution with Older Gate Valves: If a gate valve hasn’t been operated in years, forcing it may cause the gate to break, resulting in a catastrophic leak. If it feels stuck, consult a plumber. Consider replacing old gate valves with quarter-turn ball valves for reliability.
2
Pressure Reducing Valve (PRV) Adjustment
Many homes have a PRV installed where the municipal water enters the property. Its purpose is to reduce excessively high street pressure (often 100-150 PSI) to a safe household level (typically 50-75 PSI). If set too low or malfunctioning, it can cause low pressure throughout the home.
PRV Identification and Adjustment:
- Locate the PRV (usually bell-shaped device near main shutoff)
- Identify the adjustment screw (typically on top, may have a locking nut)
- Loosen the locking nut with a wrench (if present)
- Turn the adjustment screw clockwise to increase pressure (usually 1/4 turn = 5-10 PSI)
- Have someone monitor a pressure gauge while you adjust
- Aim for 55-65 PSI for optimal balance of pressure and pipe longevity
- Tighten locking nut and recheck pressure
Note: Some PRVs have a built-in pressure gauge. If yours doesn’t, attach a gauge to an outside spigot while adjusting. If adjustment doesn’t change pressure, the PRV may need replacement ($150-$300 for part, $300-$500 installed).
2. Install a Dedicated Shower Pressure Booster Pump
For homes with consistently low municipal pressure (below 40 PSI) or those on gravity-fed systems (common in older homes or rural areas), a booster pump can provide the mechanical pressure increase needed for a satisfying shower.
| Pump Type |
Best For |
Pressure Increase |
Installation Complexity |
Approximate Cost |
| Inline Booster Pump |
Single shower or whole house with moderate need |
20-40 PSI boost |
Medium (plumber recommended) |
$200-$400 + installation |
| Variable Speed Pump |
Whole house with fluctuating demand |
Adjustable 10-50 PSI |
High (professional required) |
$500-$1,500 + installation |
| Shower-Specific Pump |
Single shower, compact installation |
15-30 PSI boost |
Medium-High |
$150-$300 + installation |
| Tank-Based System |
Well systems with pressure tank |
Maintains 40/60 or 50/70 cycle |
High (professional required) |
$800-$2,000 installed |
3
Shower Pump Selection Criteria
Flow Rate Requirements: Calculate your shower’s GPM needs (typically 2.0-2.5 GPM). Choose a pump rated for at least 25% above this.
Pressure Boost Needed: Determine your current pressure and desired pressure. Most pumps specify maximum boost capability.
Power Source: Most require standard 120V outlet near installation location. Ensure GFCI protection.
Noise Level: Residential pumps should operate below 60 decibels. Look for “quiet” or “silent” models.
Compatibility: Ensure pump works with your water heater type (tankless may have specific requirements).
Warranty: Look for minimum 2-year warranty, preferably 5+ years for quality units.
Professional Installation Strongly Recommended: Booster pumps involve electrical connections, plumbing modifications, and potential code requirements. Improper installation can damage plumbing, cause leaks, or create safety hazards. This is especially important if you’re integrating it with a steam shower generator which requires specific input pressures and may have manufacturer requirements.
3. Inspect and Replace the Mixing Valve or Cartridge
If you have a single-handle shower faucet, the pressure problem may be in the mixing valve inside the wall. This cartridge blends hot and cold water. If it fails or becomes clogged with minerals, it can restrict flow to one or both supplies.
Symptoms of Failing Mixing Valve:
- Pressure drops when adjusting temperature
- Hot water pressure significantly lower than cold (or vice versa)
- Difficulty achieving consistent temperature
- Handle feels loose or “mushy”
- Visible leaks around handle or escutcheon plate
- Age of fixture (15+ years increases failure likelihood)
Replacement Considerations:
- Identify Brand/Model: Remove handle to find manufacturer markings
- Purchase Exact Replacement: Cartridges are brand and model specific
- Turn Off Water: Both hot and cold supplies must be shut off
- Special Tools: May need cartridge puller tool ($15-$30)
- Difficulty: Medium – requires removing trim, accessing valve
- Professional Cost: $150-$300 for plumber to replace cartridge
💡
Pro Tip: Pressure Balancing vs. Thermostatic Valves
If replacing your shower valve, consider upgrading to a pressure-balancing or thermostatic valve. Pressure-balancing valves maintain consistent pressure when other fixtures are used (prevents cold shock when toilet flushes). Thermostatic valves maintain precise temperature (±1-2°F) regardless of pressure changes. Both improve shower experience but have different price points and installation requirements.
4. Address Pipe Restriction and Corrosion Issues
In older homes (pre-1970), galvanized steel pipes were common. Over decades, these pipes corrode internally, reducing diameter and restricting flow. The corrosion buildup, called “tuberculation,” can reduce effective pipe diameter by 50% or more.
4
Diagnosing Pipe Restriction
Signs of Pipe Issues:
- Brown or rusty water (especially when first turned on)
- Gradual pressure decrease over years (not sudden)
- Multiple fixtures affected throughout home
- Home built before 1970 with original plumbing
- Visible corrosion on pipe fittings
- Water has metallic taste
Testing Methods:
- Pressure Drop Test: Compare static vs. dynamic pressure
- Flow Rate Comparison: Test flow at different fixtures
- Professional Inspection: Plumber may use borescope camera
- Water Analysis: Test for iron content (indicator of pipe corrosion)
- Age Assessment: Document plumbing system age and materials
Solutions for Pipe Restriction:
- Pipe Descaling: For moderate buildup, professional descaling ($500-$1,500) can restore flow without replacement
- Pipe Replacement: For severe corrosion, repiping with PEX or copper ($2,000-$10,000 depending on home size)
- Point-of-Use Solutions: Install individual booster pumps at critical fixtures as temporary solution
- Water Treatment: Install whole-house water softener if hardness accelerates corrosion
Phase 5: Maintenance and Lifestyle Tips for Sustained Pressure
Maintaining optimal water pressure isn’t just about initial fixes; it’s about establishing routines and making informed choices about your plumbing system. Just like you might wonder whether to shave before or after a shower (hint: after, when the steam softens the hair), you should incorporate “pressure maintenance” into your home care regimen.
Routine Maintenance Schedule
| Frequency |
Task |
Procedure |
Time Required |
Tools/Supplies |
| Monthly |
Visual Inspection |
Check for leaks, drips, corrosion around fixtures |
5 minutes |
Flashlight |
| Quarterly |
Shower Head Cleaning |
Vinegar soak, nozzle cleaning |
30 minutes |
Vinegar, container, brush |
| Biannually |
Aerator Cleaning |
Remove and clean sink aerators |
15 minutes per fixture |
Pliers, vinegar, small brush |
| Annually |
Pressure Measurement |
Test static and dynamic pressure |
20 minutes |
Pressure gauge |
| Every 2-3 Years |
Water Heater Flush |
Drain sediment from water heater |
60-90 minutes |
Garden hose, bucket |
| Every 5 Years |
Valve Exercise |
Operate all shutoff valves fully open/closed |
30 minutes |
Adjustable wrench |
Design Considerations for New Construction or Renovation
If you’re planning a bathroom renovation or new construction, strategic design decisions can prevent pressure problems from the start:
Pipe Sizing Strategy
- Main Supply: 1-inch pipe from street to house (minimum 3/4-inch)
- Branch Lines: 3/4-inch to bathrooms (not 1/2-inch)
- Shower Supply: Separate 1/2-inch lines for hot and cold
- Manifold System: Consider home-run PEX with individual lines to each fixture
- Future-Proofing: Oversize pipes slightly for potential additions
Fixture Selection
- Choose shower valves with high flow capacity (check specifications)
- Select shower heads with removable restrictors for adjustment flexibility
- Consider pressure-compensating fixtures for consistent performance
- Look for WaterSense labeled products for efficiency without sacrificing performance
System Design
- Minimize pipe runs (shorter distance = less pressure loss)
- Avoid unnecessary elbows and fittings (each creates resistance)
- Consider a recirculation system for instant hot water (with pressure consideration)
- Plan for accessible shutoff valves at each fixture
- Include a whole-house pressure gauge for easy monitoring
Special Considerations
Also, consider your environment. If you are renovating a small space, look at our 65 walk-in shower ideas. When designing a new shower, choose wide-diameter piping (3/4 inch instead of 1/2 inch) to ensure maximum volume reaches the head. For luxury setups, ensure your design accommodates any planned additions like rainfall shower systems or body sprays that require substantial water volume.
Frequently Asked Questions (FAQ): Comprehensive Expansion
Does a smaller shower head actually increase pressure, and what’s the physics behind it?
Yes, smaller shower heads can increase water velocity (which feels like pressure) due to basic fluid dynamics principles. According to Bernoulli’s principle and the continuity equation, when water flows through a constriction (smaller opening), its velocity must increase to maintain the same flow rate. This is expressed mathematically as:
A₁V₁ = A₂V₂ (Continuity Equation)
Where A is cross-sectional area and V is velocity.
Practical Implications:
- Compact Heads (3-5 inches): Concentrate flow through fewer, smaller nozzles = higher velocity
- Rainfall Heads (8-12 inches): Spread same water volume over larger area = lower velocity per nozzle
- Nozzle Size: Smaller nozzles (0.3mm vs 0.5mm) increase velocity but are more prone to clogging
- Pattern Design: Converging nozzle patterns increase velocity toward center
Recommendations by Pressure Level:
- Low Pressure (30-45 PSI): Choose compact heads with small nozzle clusters
- Medium Pressure (45-60 PSI): Medium-sized heads (5-7 inches) with adjustable patterns
- High Pressure (60+ PSI): Can use larger rainfall heads without losing velocity sensation
- Variable Pressure: Select heads with multiple settings for flexibility
Bottom Line: If pressure is your primary goal, stick to compact heads with converging nozzle designs. Large “rainfall” heads spread the water out, reducing the impact feel but providing luxurious coverage. Some advanced heads like the Speakman Icon allow you to adjust from concentrated jet to wide spray, offering both experiences in one unit.
Is it illegal to remove the flow restrictor, and what are the real consequences?
This question has legal, environmental, and practical dimensions that homeowners should consider carefully.
Legal Status:
- Federal Level: No law prohibits homeowners from modifying fixtures in their own homes
- Manufacturer Requirements: Companies must install restrictors to meet DOE standards (2.5 GPM at 80 PSI)
- Local Ordinances: Some municipalities (especially drought-prone areas) have stricter limits
- Building Codes: New construction must meet code requirements during inspection
- Rental Properties: Landlords may have different obligations than homeowners
Practical Consequences:
- Water Waste: Increases from 2.5 GPM to 3.5-5.0 GPM (40-100% more)
- Utility Costs: Additional 10,000-20,000 gallons annually for family of four
- Heating Costs: More hot water used = higher energy bills
- Septic System Impact: Increased volume can overload systems
Environmental Impact Calculation:
For a family of four with daily 8-minute showers:
- With Restrictor (2.5 GPM): 80 gallons daily, 29,200 gallons annually
- Without Restrictor (4.0 GPM): 128 gallons daily, 46,720 gallons annually
- Difference: 17,520 gallons extra annually
- Carbon Footprint: Additional energy to treat and heat water ≈ 500 kWh electricity or 50 therms gas
- Cost Impact: $70-$150 additional annually for water and energy
Balanced Approach:
Rather than complete removal, consider:
- Enlarging restrictor hole with drill bit (increase to 3.0 GPM)
- Installing adjustable flow shower head
- Using high-pressure head that feels powerful at 2.5 GPM
- Only removing during specific needs (hair rinsing) then replacing
ℹ️
Professional Perspective: Most plumbers recommend against complete restrictor removal. Instead, they suggest selecting shower heads specifically designed for high-pressure feel at lower flow rates, or installing flow regulators that can be adjusted to optimal levels for your specific water pressure conditions.
How does low water pressure affect tankless water heaters, and what are the solutions?
Tankless water heaters have specific pressure and flow requirements that differ from traditional tank heaters. Understanding these requirements is crucial when diagnosing shower pressure issues in homes with tankless systems.
Tankless Heater Operation Basics:
- Minimum Flow Activation: Most require 0.5-0.7 GPM to ignite
- Temperature Rise Limitations: Maximum temperature increase based on flow rate
- Simultaneous Use Issues: Multiple fixtures can exceed heater capacity
- Cold Water Sandwich: Brief cold water between heating cycles
- Mineral Buildup: Scale can restrict internal heat exchanger
Pressure-Related Problems:
- Failure to Ignite: Pressure/flow below minimum threshold
- Fluctuating Temperature: Pressure variations affect flow rate through heater
- Error Codes: Many units display specific codes for flow issues
- Reduced Lifespan: Constant cycling due to low flow
Diagnostic Steps for Tankless Systems:
- Check manufacturer’s minimum flow requirement (varies by model)
- Measure actual flow rate at heater inlet (with pressure gauge)
- Inspect inlet filter/strainer for debris (common issue)
- Check for scale buildup in heat exchanger (may need descaling)
- Verify gas supply/pressure (for gas models)
- Test with other fixtures off to isolate shower-specific issues
Solutions for Tankless Pressure Issues:
- Install Recirculation Pump: Maintains minimum flow for instant hot water
- Add Secondary Storage Tank: Small tank after heater buffers pressure fluctuations
- Whole-House Pressure Booster: Increases pressure to all fixtures
- Proper Sizing: Ensure heater is correctly sized for household demand
- Regular Descaling: Follow manufacturer’s maintenance schedule
This is a common reason why showers don’t get hot in homes with tankless systems. The interaction between pressure, flow rate, and temperature regulation is more complex with tankless than with traditional tank heaters. Professional assessment by a technician certified for your specific brand is often needed for persistent issues.
What should I do if I have excessively high water pressure that’s uncomfortable or damaging?
While this guide focuses on low pressure, excessively high pressure (above 80 PSI) presents its own problems, including discomfort, fixture damage, and increased leak risk. Here’s how to address pressure that’s too high.
| Symptom of High Pressure |
Potential Damage |
Immediate Action |
Long-Term Solution |
| Water “stings” or hurts skin |
Discomfort, may discourage shower use |
Install pressure-reducing shower head |
Adjust or install Pressure Reducing Valve (PRV) |
| Frequent fixture leaks |
Worn washers, damaged seals |
Replace washers more frequently |
Reduce household pressure to 55-65 PSI |
| Water hammer (banging pipes) |
Pipe joint damage, potential burst |
Install water hammer arrestors |
Reduce pressure and install arrestors at key locations |
| Shortened appliance lifespan |
Premature failure of water heater, washing machine, etc. |
Monitor appliances for leaks |
Install PRV to protect all appliances |
| High water bills |
Increased consumption from higher flow |
Install flow-restricting aerators |
Balance pressure for efficiency and comfort |
1
Installing or Adjusting a Pressure Reducing Valve (PRV)
If You Have an Existing PRV:
- Locate PRV (usually near main water entry)
- Attach pressure gauge to outdoor spigot
- Loosen lock nut on adjustment screw
- Turn screw counterclockwise to reduce pressure
- Monitor gauge while adjusting
- Aim for 55-65 PSI
- Tighten lock nut and recheck pressure
If You Need a New PRV:
- Professional Installation Recommended: Involves cutting main line
- Cost: $300-$500 installed
- Types: Direct-acting (simpler) vs. pilot-operated (more precise)
- Sizing: Based on household flow requirements
- Features: Some include built-in pressure gauge, bypass valve
- Warranty: Look for 10+ year warranty on quality units
💡
Shower-Specific Solutions for High Pressure
If the pressure is too stinging even after whole-house adjustment, you might need a rainfall shower system which disperses that force over a wider area for a gentler feel. Alternatively, consider shower heads with adjustable spray patterns that include a “soft” or “massage” setting. Some high-end systems allow you to program pressure preferences for different users.
How do water softeners and filtration systems affect shower pressure?
Water treatment systems can impact pressure in several ways, both positive and negative. Understanding these effects helps optimize both water quality and pressure.
Water Softeners:
- Pressure Drop: Typically 3-8 PSI through softener during service flow
- Bypass Valve: Most have bypass for maintenance without pressure loss
- Regeneration Cycle: May cause temporary pressure fluctuations
- Long-Term Benefit: Reduces scale buildup that restricts flow over time
- Sizing Importance: Undersized softener causes excessive pressure drop
Whole-House Filtration:
- Sediment Filters: Clog over time, increasing pressure drop
- Carbon Filters: Typically 2-5 PSI drop when new, increases as carbon saturates
- Reverse Osmosis: Not typically whole-house due to pressure requirements
- UV Systems: Minimal pressure impact (1-2 PSI)
- Maintenance Schedule: Critical to prevent excessive pressure loss
Pressure Impact Calculations:
For a typical whole-house system:
- Softener: 5 PSI drop
- Sediment Filter: 3 PSI drop (new), up to 15+ when clogged
- Carbon Filter: 4 PSI drop (new), up to 20+ when spent
- UV System: 2 PSI drop
- Total: 14 PSI drop when new, potentially 40+ PSI when maintenance neglected
Optimization Strategies:
- Install pressure gauge before and after treatment system
- Size system for household peak flow, not average
- Establish strict filter replacement schedule
- Consider separate lines for outdoor irrigation (bypass treatment)
- Install booster pump after treatment if needed
- Monitor pressure differential as maintenance indicator
Bottom Line: Water treatment systems inevitably cause some pressure loss. The key is proper sizing, regular maintenance, and monitoring. The benefits of softened, filtered water (reduced scale, better soap lathering, skin benefits) often outweigh modest pressure reductions, especially when systems are properly maintained.
💡
Did you know? Pressure Folklore and Facts
Many people ask is it bad luck to shower on New Year’s Day? Folklore suggests you wash your luck away, but we believe starting the year with high water pressure and a clean start is the best luck you can have! Interestingly, in some cultures, water pressure was believed to carry spiritual energy – strong flow meant positive energy, weak flow meant stagnation. While we don’t endorse the supernatural aspects, the psychological boost of a powerful, refreshing shower is very real and scientifically validated for mood improvement.
Conclusion: Creating Your Pressure Optimization Plan
Fixing low water pressure is typically a systematic journey of elimination rather than a single magical solution. By following the structured approach outlined in this guide, you can diagnose your specific issue and implement targeted solutions that balance performance, cost, and sustainability.
Summary of Recommended Approach:
Step 1: Diagnosis (Day 1)
- Measure static and dynamic pressure
- Identify symptom pattern (single fixture vs. whole house)
- Check for obvious issues (valves, leaks)
- Document findings for reference
Step 2: Immediate Solutions (Day 2-3)
- Clean shower head with vinegar solution
- Check and adjust flow restrictor if needed
- Inspect and repair any leaks
- Test pressure improvement
Step 3: Hardware Upgrades (Week 1)
- Select appropriate high-pressure shower head
- Consider filtration if water quality is issue
- Install and test new hardware
- Evaluate if pressure meets expectations
Step 4: Systemic Solutions (Week 2-4 if needed)
- Consult professionals for complex issues
- Consider booster pump for persistent low pressure
- Address pipe or valve issues identified earlier
- Establish maintenance routine
Start with the cheap and easy fixes: clean the head and check for restrictors. If that fails, upgrade to a specialized high-pressure head like the Speakman Icon (for professional-grade performance) or the SparkPod (for budget-friendly improvement). For systemic issues, consult with a licensed plumber who can perform advanced diagnostics and recommend appropriate solutions like booster pumps, pipe replacement, or valve upgrades.
Remember, a great shower experience is about more than just water pressure; it’s about comfort, safety, and enjoyment. Whether you need a sturdy shower chair for stability during longer showers, the best shower curtains to contain that high-pressure spray, or accessories to enhance your experience, optimizing your bathroom is always a worthy investment in daily quality of life.
💡
Final Professional Recommendation
Keep a pressure gauge ($10-$20) and basic plumbing tools (adjustable wrench, Teflon tape, washers) in your home maintenance kit. Regular pressure monitoring (quarterly) helps catch issues early before they become major problems. Document your pressure readings seasonally, as municipal pressure can vary throughout the year. This data is invaluable for diagnosing future issues and communicating effectively with plumbing professionals if needed.
Disclaimer: As an Amazon Associate, ShowerBlog earns from qualifying purchases. The information provided in this guide is for educational purposes only. Water pressure issues can involve complex plumbing systems. While many solutions are DIY-friendly, consult with licensed plumbing professionals for diagnosis and repair of complex issues, especially those involving main water lines, electrical components, or structural modifications. Follow all local building codes and manufacturer instructions. The author and publisher are not responsible for any damages, injuries, or losses resulting from the use or misuse of this information.