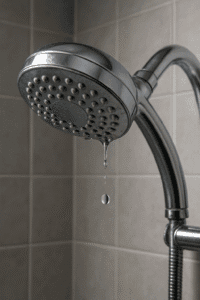
Why Is My Shower Head Leaking?
A leaking shower head might seem like a small annoyance, but it can lead to higher water bills and water damage. The good news is, it’s often fixable without professional help. In this guide, we’ll explore the top reasons why your shower head might be leaking and provide step-by-step instructions to fix it.
🔧 Common Causes of a Leaky Shower Head
- Worn-Out Rubber Washer or O-Ring: Over time, these rubber seals degrade, crack, or become misshapen, breaking the seal.
- Limescale and Mineral Buildup: Hard water deposits can clog nozzles or cause internal pressure buildup, forcing water out.
- Loose or Damaged Connections: If the shower head isn’t tightly screwed on, or if threads are corroded, water may escape.
- Cracked Shower Head: Plastic and low-quality metal heads can develop cracks due to age or impact.
- High Water Pressure: Unusually high pressure can stress your shower head and its connections, causing leaks.
- Valve Issues (Leaking When Turned Off): A worn valve cartridge or a faulty diverter valve could be the real culprit.
🛠️ Step-by-Step: How to Fix a Leaking Shower Head
-
Step 1: Turn Off the Water Supply
Ensure the faucet is completely turned off before you begin any work.
-
Step 2: Remove the Shower Head
Use a wrench to gently unscrew the shower head from the arm. Protect the fixture’s finish with a cloth to avoid scratches.
-
Step 3: Inspect and Clean
Remove the rubber washer and check for damage. Clean out any debris or mineral buildup with vinegar and a toothbrush. Soak the head in vinegar for 30–60 minutes for heavy limescale.
-
Step 4: Replace the Washer or O-Ring
Install a new, correctly-sized washer if the old one appears damaged or worn.
-
Step 5: Apply Teflon Tape
Wrap the shower arm threads with plumber’s tape (3-4 times, clockwise) to ensure a watertight seal.
-
Step 6: Reattach and Test
Screw the shower head back on securely (hand-tighten first, then a quarter-turn with the wrench) and turn the water on to test for leaks.
🧠 When It’s Not the Shower Head: Valve & Plumbing Issues
If the leak continues after trying the fixes above, the problem may lie with the valve behind the wall. Symptoms include a constant drip, difficulty turning the handle, or noisy operation. This may require replacing the valve cartridge, a task best left to a plumber unless you are experienced.
📋 FAQs: Shower Head Leaking
❓ Why is my shower head leaking at night?
This may be due to residual water draining or pressure changes in the pipes. If it’s a persistent drip, check the washer and shower valve.
❓ Can Teflon tape stop a leak?
Yes, Teflon tape is essential for creating a watertight seal on the threads between the shower arm and the head.
❓ How long should a shower head last?
A good quality shower head should last 8–10 years with regular cleaning and maintenance.
🖼️ Bonus: Visual Troubleshooting Chart
| Leak Location |
Likely Cause |
DIY Fix |
| From spray holes when off |
Faulty valve or cartridge |
Replace valve cartridge |
| At the base (connection) |
Loose connection or bad washer |
Add Teflon tape, replace washer |
| From the face or side |
Cracked head or limescale |
Replace shower head or clean thoroughly |
| Dripping after shower |
Normal draining or water pressure |
Wait a few minutes or install pressure regulator |
Remember: If DIY fixes don’t work, don’t hesitate to call a plumber to avoid further damage.
🚿 Don’t Miss These Hot Shower Reads:


