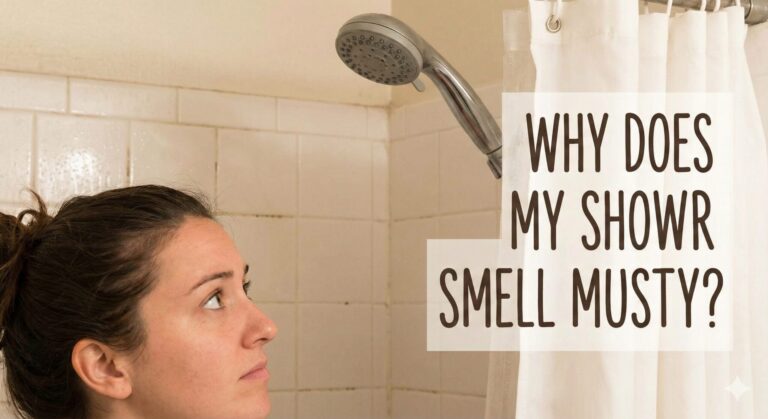
Shower Not Getting Hot (But Sink Is)? A Pro’s Guide to Diagnosing and Fixing It
It’s a miserable start to the day: you step into the shower, turn the handle to hot, and are met with a blast of lukewarm or icy-cold water. You wait. And wait. Nothing. Frustrated, you test the bathroom sink faucet and… steaming hot water comes out instantly. What gives?
This is a very common problem affecting approximately 25% of homes at some point, and it’s also a huge diagnostic clue. If your sink has hot water but your shower doesn’t, it means your water heater is working perfectly. The problem is isolated entirely to the shower plumbing system. In this comprehensive guide, we’ll explore the 12 most likely causes and provide detailed solutions for each.
Hot Water Problem Statistics:
• Most Common Cause: Failed shower valve cartridge (45% of cases)
• Average DIY Repair Cost: $30-150 vs. Plumber Cost: $200-500
• Typical Cartridge Lifespan: 8-12 years
• Water Heater vs. Fixture Problems: 70% are fixture-specific when sinks have hot water
• Temperature Loss in Pipes: 1-2°F per 10 feet of uninsulated pipe
Part 1: Understanding Hot Water Delivery Systems
The Physics of Hot Water Distribution
Before diagnosing problems, it’s essential to understand how hot water reaches your shower:
Hot Water Flow Dynamics:
Pressure Differential: Hot water systems rely on pressure differences between the cold supply and heated water. The water heater creates thermal expansion, increasing pressure in the hot water lines.
Thermal Stratification: Hot water rises to the top of the tank due to lower density (ρ ≈ 983 kg/m³ at 120°F vs 999 kg/m³ at 50°F).
Pipe Heat Loss: Uninsulated copper pipes lose approximately 15-25 BTU/hr per linear foot, causing temperature drops of 1-2°F per 10 feet.
Flow Rate Impact: Higher flow rates (GPM) reduce contact time with heating elements and increase temperature drop through pipes.
Temperature Testing Protocol
Scientific Temperature Measurement Method
- Use a digital thermometer accurate to ±1°F (not your hand)
- Test at maximum hot setting for each fixture
- Measure after 60 seconds of continuous flow
- Record temperatures from multiple fixtures simultaneously
- Calculate differentials: Bathroom sink vs shower, first floor vs second floor
- Water heater temperature: Should be set to 120°F for safety, 140°F for some applications
Digital Water Thermometer
Essential for accurate diagnosis. This waterproof thermometer measures 32°F to 482°F with ±1°F accuracy. Features a 4-inch probe for safe water testing, auto-off function, and clear LCD display. Knowing exact temperatures helps differentiate between cartridge issues, pipe problems, and water heater settings.
Check Price on Amazon
Part 2: Comprehensive Diagnostic Flowchart
Hot Water Diagnostic Decision Tree
Step 1: Initial Symptom Assessment
Q: Does ANY fixture in your home have hot water?
- No hot water anywhere: Water heater problem → Proceed to Part 6
- Some fixtures have hot water: Fixture-specific or localized problem → Proceed to Step 2
Step 2: Localization Test
Q: Which specific fixtures lack hot water?
- Only shower(s): Likely cartridge or anti-scald device → Proceed to Part 3
- Multiple fixtures on same line: Branch line or cross-connection issue → Proceed to Part 4
- Upper floor fixtures only: Pressure/gravity issue → Proceed to Part 5
Step 3: Temperature Pattern Analysis
Q: What is the temperature behavior?
- Never gets hot: Complete blockage or valve failure
- Gets warm but not hot: Partial blockage or mixing issue
- Hot then cold: Water heater capacity or dip tube problem
- Temperature fluctuates: Pressure balancing or thermostatic valve issue
Part 3: The #1 Culprit: A Failed Shower Valve Cartridge
Behind your shower handle, inside the wall, is a brass fixture called a shower mixing valve. Its job is to blend the hot and cold water from your pipes to deliver the perfect temperature you select. The “brains” of this operation is a removable cartridge, which is the most common failure point in shower systems.
Anatomy of a Shower Valve Cartridge
Cartridge Components and Functions:
Inlet Ports: Separate openings for hot (typically left) and cold (right) water supply.
Mixing Chamber: Where hot and cold water combine based on handle position.
Thermostatic Element: In thermostatic valves, wax or bi-metal element expands/contracts to maintain set temperature.
Pressure Balancing Spool: In pressure-balancing valves, piston moves to maintain ratio if supply pressure changes.
O-Rings and Seals: Typically 4-8 rubber rings that prevent leaks and cross-contamination between hot/cold sides.
Why Your Cartridge Fails and Blocks Hot Water
1. Mineral Buildup (Most Common)
Hard water deposits (calcium carbonate) accumulate at rate of approximately 0.01 inches per year in moderate hard water areas. These deposits preferentially block the smaller hot water inlet port (typically 3/8″ vs cold at 1/2″) due to thermal precipitation.
Chemical Reaction: Ca(HCO₃)₂ → CaCO₃↓ + CO₂ + H₂O when heated
2. O-Ring Degradation
Rubber O-rings (typically EPDM or nitrile) degrade due to:
• Chlorine attack (0.5-4 ppm in municipal water)
• Thermal cycling (120°F to 70°F daily)
• Age hardening (5-10 year lifespan)
• Swelling from microbial attack (biofilms)
3. Mechanical Wear
Internal components wear from:
• Friction: 20-40 cycles per day × 365 days × 10 years = 73,000-146,000 cycles
• Water hammer: Pressure spikes up to 150 PSI can damage internal seals
• Improper installation: Misalignment causes asymmetric wear
Brand-Specific Cartridge Identification
| Brand |
Common Models |
Lifespan |
Replacement Cost |
Special Tools Required |
| Moen |
1222, 1225, 1255 |
8-12 years |
$25-45 |
Cartridge puller (#107086) |
| Delta |
RP17453, RP19804 |
10-15 years |
$20-35 |
Valve tool (#UT8006) |
| Kohler |
R74060, R47004 |
12-15 years |
$35-60 |
Allen wrench set |
| American Standard |
2034.208, 1C-275 |
10-12 years |
$30-50 |
Retaining clip tool |
| Pfister |
910-021, 974-052 |
8-10 years |
$25-40 |
Handle puller |
How to Replace Your Shower Valve Cartridge: Professional Step-by-Step Guide
This might sound intimidating, but it’s a very manageable DIY project. Follow these steps carefully for a successful repair.
Complete Cartridge Replacement Protocol
-
CRUCIAL FIRST STEP: Turn Off Your Water! Find the main water shutoff valve for your house (often in a basement, garage, or utility closet) and turn it completely off. Then, open the lowest faucet in the house (usually basement or first floor) to drain the remaining water from the pipes. Note: For multi-story homes, also open an upper floor faucet to break vacuum.
- Identify Your Faucet Brand and Model. You need the EXACT replacement cartridge. Look for a brand name (e.g., Moen, Delta, Kohler, American Standard) on the shower handle or the decorative trim plate behind it. Take photos from multiple angles.
- Remove the Handle. Most handles are held on by a very small screw. It’s often hidden under a plastic cap on the front or in a small hole on the side (you’ll need an Allen key for this type). If stuck, use a handle puller tool to avoid damaging the finish.
- Remove the Trim/Sleeve. With the handle off, you can usually slide off the decorative metal sleeve and trim plate, exposing the valve in the wall. You might need to unscrew the plate. Note the order of components for reassembly.
- Remove the Retaining Clip. Look closely at the top of the valve. You will see a small, U-shaped metal clip holding the cartridge in place. Use needle-nose pliers or a flathead screwdriver to pull this clip straight up and out. Don’t lose it!
-
Pull Out the Old Cartridge. This can be the trickiest part. The cartridge may be stuck from years of mineral buildup. Follow this sequence:
- Gently wiggle cartridge back and forth with adjustable pliers
- Apply penetrating oil (PB Blaster or similar) and wait 15 minutes
- Use a specialty cartridge puller tool (see products below)
- For extreme cases, apply gentle heat with a hairdryer (never open flame)
Documentation Tip: Take a photo of the old cartridge before you leave for the store, or better yet, bring the old part with you to ensure you buy a perfect match. Note the orientation (H/C markings, notch positions).
- Clean the Valve Body. Before installing new cartridge:
- Use a small brush to clean mineral deposits from valve bore
- Flush with vinegar if heavy buildup
- Inspect for cracks or damage to valve body
- Check O-ring grooves for nicks or debris
- Install the New Cartridge. Lightly coat the O-rings of the new cartridge with plumber’s silicone grease (not petroleum-based). This reduces friction (coefficient drops from 0.8 to 0.1) and extends seal life. Make sure to orient it correctly—many have “H” and “C” markings or alignment notches. Push it in firmly until it’s fully seated (typically 1/8-1/4″ past flush).
- Reassemble and Test. Re-insert the retaining clip, ensuring it clicks into place. Now, go turn the main water supply back on SLOWLY. Check for any drips around the valve. If it’s dry, re-install the trim plate and handle. You’re done!
- Performance Testing. After repair:
- Check for full temperature range (cold to hot)
- Test pressure balancing (turn on another fixture while showering)
- Monitor for leaks over 24 hours
- Verify anti-scald function if applicable
Part 4: Problem: Shower Not Getting Hot *Enough*? Adjust the Anti-Scald Device
If your shower gets warm but not truly hot, the issue might be a safety feature called an **anti-scald device** or **rotational limit stop**. This is a plastic or metal ring, usually with teeth like a gear, that sits right behind your handle. It’s designed to physically stop the handle from turning too far into the hot zone to prevent burns, especially important for households with children or elderly.
Scald Prevention Standards:
According to ANSI A112.18.1, shower valves must limit maximum outlet temperature to 120°F (49°C) or include a means to adjust the limit. Third-degree burns can occur in:
• 6 seconds at 140°F (60°C)
• 30 seconds at 130°F (54°C)
• 5 minutes at 120°F (49°C)
Most manufacturers set factory limit at 110-115°F for added safety.
Complete Anti-Scald Adjustment Procedure
- Remove the shower handle (see Step 3 in previous section).
- Identify the limit stop. You will see a plastic or metal, gear-like ring on the valve stem. Some models have an external adjustment screw instead.
- Determine adjustment method:
- Rotational limit stop: Pull ring off, rotate counter-clockwise 1-2 notches (towards “hot”), reinstall
- Screw adjustment: Use Allen wrench or screwdriver to turn adjustment screw
- Temperature limiting cartridge: Some cartridges have built-in limit that requires cartridge replacement
- Test incrementally. Make small adjustments (1 notch or ¼ turn at a time) and test temperature with a thermometer. Maximum recommended is 120°F (49°C).
- Reassemble and verify safety. Ensure the limit still provides burn protection while delivering adequate hot water.
Safety Warning: Increasing the hot water limit above 120°F (49°C) creates scald risk, especially for children, elderly, and disabled individuals. Water at 140°F can cause third-degree burns in 6 seconds. Always test temperature with a thermometer and consider installing anti-scald devices at point of use if increasing limits.
Part 5: Thermostatic Mixing Valve Troubleshooting
Modern showers often feature thermostatic mixing valves (TMVs) that maintain constant temperature regardless of pressure fluctuations. These are more complex than standard pressure-balancing valves.
How Thermostatic Valves Work:
TMVs use a temperature-sensitive element (usually wax or bi-metal) that expands or contracts with temperature changes. The element controls a piston that adjusts the hot/cold mixing ratio. Key components:
• Thermostatic element: Wax expands ~10% volume per 18°F (10°C) change
• Control piston: Regulates flow with 0.1-0.5mm movement
• Temperature setting: Typically adjustable from 85°F to 120°F
• Fail-safe: Spring-loaded to close hot port if cold supply fails
Common TMV Problems and Solutions
1. Wax Element Failure
Symptoms: Temperature drifts, cannot reach set point
Causes: Wax degradation, element leakage
Solution: Replace thermostatic cartridge (not mixing cartridge)
DIY Difficulty: Moderate
2. Sediment in Sensing Area
Symptoms: Slow response, temperature fluctuations
Causes: Mineral deposits on sensing element
Solution: Clean with vinegar, install sediment filter
DIY Difficulty: Easy-Moderate
3. Calibration Drift
Symptoms: Temperature doesn’t match dial setting
Causes: Mechanical wear, spring fatigue
Solution: Recalibrate per manufacturer instructions
DIY Difficulty: Moderate
TMV Calibration Procedure
Professional Thermostatic Valve Calibration
- Set water heater to exactly 120°F (use thermometer)
- Remove temperature knob/cover to access adjustment
- Run shower at desired temperature setting
- Measure output temperature with digital thermometer
- Adjust calibration screw until measured = desired temperature
- Test at multiple temperature settings (low, medium, high)
- Verify fail-safe: Shut off cold supply, shower should stop within 3 seconds
- Document settings for future reference
Part 6: Cross-Connection and Pipe Configuration Issues
The Cross-Linked Connection Problem
Sometimes, hot and cold water lines become connected where they shouldn’t be, creating a “cross-connection.” This allows cold water to mix with hot water before it reaches the shower.
Common Cross-Connection Points:
1. Single-handle faucets: Worn cartridge allows internal mixing
2. Dishwasher connections: Improper air gap installation
3. Washing machine valves: Simultaneous hot/cold supply
4. Water hammer arrestors: Improperly installed units
5. Recirculating systems: Faulty check valves
How to Test for Cross-Connections
- Turn off main water supply
- Open all hot water faucets to drain system
- Close all faucets except one hot water faucet
- Turn cold water supply back on
- If water flows from hot faucet, you have a cross-connection
- Systematically isolate sections to locate connection point
Pipe Insulation and Heat Loss
Uninsulated hot water pipes lose significant heat, especially over long runs or in cold spaces.
Heat Loss Calculations
• Bare copper pipe: 35-50 BTU/hr per linear foot at ΔT=50°F
• With 1/2″ foam insulation: 5-8 BTU/hr per linear foot
• Temperature drop: 1-2°F per 10 feet of bare pipe
• Energy cost: $20-40 annually per 50 feet of uninsulated pipe
• Payback period: 6-12 months for pipe insulation
Frost King Pipe Insulation
Self-sealing foam pipe insulation reduces heat loss by 80-90%. Easy installation with pre-slit design and adhesive strip. R-value of 4.0 per inch, suitable for hot water pipes up to 220°F. Available in various sizes to fit 1/2″ to 1″ pipes. Essential for maintaining water temperature in long pipe runs, especially in basements and crawl spaces.
Check Price on Amazon
Part 7: Water Heater Specific Issues Affecting Showers
What if my sink ALSO has no hot water? If there’s no hot water anywhere in the house, the problem is not your shower. It’s your water heater. If you have a gas heater, the pilot light may be out. If electric, a heating element or thermostat may have failed. This usually requires professional diagnosis.
Water Heater Problems That Can Affect Showers Differently
1. Dipping Tube Failure
Symptom: Hot water runs out quickly, showers affected more than sinks
Cause: Plastic tube that delivers cold water to bottom of tank breaks
Effect: Cold water enters at top, mixing with hot water immediately
Solution: Replace dip tube (requires draining water heater)
2. Sediment Buildup
Symptom: Reduced capacity, longer recovery time
Cause: Mineral deposits at tank bottom insulate heating elements
Effect: Showers (higher flow) deplete tank faster than sinks
Solution: Flush water heater annually
3. Heat Trap Nipple Failure
Symptom: Hot water at fixtures closest to heater, lukewarm farther away
Cause: Check valves in heat trap nipples fail, allowing convection
Effect: Hot water rises back into tank through hot water outlet
Solution: Replace heat trap nipples or install external check valves
Water Heater Temperature Differential Testing
Differential Temperature Analysis
Measure temperatures at these points to diagnose water heater issues:
| Measurement Point |
Normal Reading |
Problem Indicated |
| Tank thermostat setting |
120-140°F |
If lower, adjust thermostat |
| Hot water at heater |
±5°F of thermostat |
Large differential indicates element/thermostat failure |
| Hot water at nearest faucet |
±10°F of tank temp |
Large drop indicates pipe insulation issue |
| Hot water at farthest faucet |
±15°F of tank temp |
Excessive drop indicates recirculation or insulation problem |
| Temperature after 5 min shower |
Stable within 5°F |
Declining temperature indicates tank capacity/dip tube issue |
Recirculating Pump Systems
Homes with recirculating pumps maintain hot water in pipes, providing instant hot water. These systems can cause unique temperature issues.
Recirculating System Components:
• Circulation pump: Small pump (10-40 watts) that moves water through loop
• Check valves: Prevent backflow and thermosiphoning
• Thermostatic valve: Returns water to heater when below set point
• Timer/controller: Operates pump during peak usage times
• Dedicated return line: Separate pipe for cooled water return (best)
• Under-sink systems: Use existing cold water line as return (common retrofit)
Recirculating System Troubleshooting
- Check pump operation: Listen for humming, feel pipes for vibration
- Test check valves: Should allow flow in one direction only
- Verify timer settings: Pump should run during morning/evening peak times
- Check aquastat setting: Typically 100-110°F (lower than tank setting)
- Inspect for cross-connection: Faulty check valves can mix hot/cold lines
- Measure loop temperature: Should maintain 100°F+ during pump operation
Part 8: Multi-Story and Pressure-Related Issues
Gravity and Pressure Effects in Multi-Story Homes
Hydrostatic Pressure Calculations:
Pressure (PSI) = Height (feet) × 0.433 PSI/ft
• 10 foot height difference = 4.33 PSI differential
• Hot water systems: Lower density reduces pressure slightly
• Shower (typically upper floor) vs sink (lower floor): 3-8 PSI difference
• Pressure-balancing valves require minimum 20 PSI differential to function properly
Solutions for Multi-Story Temperature Problems
Pressure-Balancing Valve Upgrade
Install valves with lower minimum pressure requirement (some work down to 8 PSI differential)
Cost: $75-150 per valve
DIY Difficulty: Moderate
Pressure-Boosting System
Install pressure booster pump for entire house or upper floors only
Cost: $400-1,200 installed
DIY Difficulty: High (professional recommended)
Thermostatic Valve Installation
Replace pressure-balancing with thermostatic valves less sensitive to pressure changes
Cost: $100-250 per valve
DIY Difficulty: Moderate
Expansion Tank Impact on Temperature
Closed plumbing systems require expansion tanks to accommodate thermal expansion. Faulty expansion tanks can affect temperature.
Expansion Tank Diagnosis
- Locate expansion tank: Usually near water heater on cold water line
- Check air pressure: Should be equal to house water pressure (use tire gauge)
- Tap test: Top should sound hollow, bottom solid (if waterlogged)
- Temperature effect: Waterlogged tank reduces system pressure, affecting shower temperature consistency
- Replacement: Drain system, remove old tank, install new pre-charged tank
Part 9: Essential Tools & Parts for the Job
Moen 1222 Posi-Temp Replacement Cartridge
This is one of the most common shower cartridges in U.S. homes. If you have a single-handle Moen shower, this is likely the part you need. Features brass construction, pressure-balancing technology, and easy quarter-turn installation. Always double-check your old part to be sure, but this is the hero that restores hot water for thousands of people. Includes O-rings pre-lubricated with silicone grease.
Check Price on Amazon
Danco Cartridge Puller Tool for Moen
If your old cartridge is stuck fast, DO NOT try to force it out with pliers. You could break the valve in the wall. This specialty tool is designed to grip the cartridge and use leverage to pull it out safely and easily. Works with most Moen 1200 and 1222 series cartridges. The hardened steel construction withstands significant force without damage. It’s worth its weight in gold for stubborn cartridge removal.
Check Price on Amazon
Waterproof Silicone Grease
A small tube of this grease is a plumber’s best friend. Applying a light coat to the rubber O-rings on your new cartridge helps it slide in smoothly, protects the rubber from damage, and ensures a watertight seal for years to come. This high-purity silicone grease is non-toxic, odorless, and maintains consistency from -40°F to 400°F. Compatible with all common plumbing O-ring materials (EPDM, nitrile, neoprene).
Check Price on Amazon
Universal Shower Valve Repair Kit
This comprehensive kit includes tools for most common shower valve repairs: cartridge puller, handle puller, seat wrench, and assortment of O-rings and washers. The universal design works with Moen, Delta, Kohler, and other major brands. Perfect for DIYers who want to tackle various shower repair projects without buying individual tools. Includes detailed instructions and identification guide.
Check Price on Amazon
Complete Tool Checklist
Cost Comparison: DIY vs Professional Solutions
| Solution |
DIY Cost |
Professional Cost |
Time Required |
Success Rate |
| Cartridge replacement |
$30-80 |
$200-350 |
60-120 min |
85% |
| Anti-scald adjustment |
$0-10 |
$75-150 |
15-30 min |
95% |
| Thermostatic valve repair |
$50-120 |
$250-450 |
90-180 min |
70% |
| Cross-connection repair |
$20-60 |
$150-300 |
60-120 min |
65% |
| Pipe insulation |
$30-100 |
$200-400 |
120-240 min |
90% |
| Recirculating pump repair |
$100-250 |
$400-800 |
120-180 min |
60% |
Part 10: Preventive Maintenance Program
Monthly Maintenance Tasks
- Temperature check: Test shower temperature with thermometer
- Flow rate test: Time how long to fill 1-gallon bucket
- Pressure test: Note if pressure drops when other fixtures run
- Visual inspection: Check for leaks around handle and trim
Annual Preventive Maintenance
Yearly Shower System Maintenance
- Cartridge inspection: Remove and inspect cartridge for wear (every 2-3 years)
- O-ring lubrication: Apply silicone grease to all accessible seals
- Valve exercise: Turn valve through full range 10 times to prevent sticking
- Pipe insulation check: Inspect and repair insulation on hot water pipes
- Water heater flush: Drain sediment from water heater (if applicable)
- Anti-scald test: Verify temperature limiting function
When to Consider Professional Maintenance
Schedule Professional Service If:
• Your home is older than 20 years with original plumbing
• You have frequent temperature fluctuations
• Multiple fixtures show similar temperature problems
• You have a recirculating system that’s not functioning properly
• You notice significant pressure drops when using hot water
• Water has metallic taste or discoloration (possible pipe corrosion)
Part 11: When to Call a Professional Plumber
Immediate Professional Attention Required If:
• You discover cross-connected pipes affecting multiple fixtures
• There are signs of pipe corrosion or leaks behind walls
• Water heater shows signs of failure (no hot water anywhere)
• You have a complex thermostatic mixing valve system
• Repairs require opening walls or extensive plumbing work
• You’re uncomfortable with any aspect of electrical or gas connections
What to Expect From a Professional Diagnosis
Professional Diagnostic Protocol
A qualified plumber should:
- Conduct systematic testing: Measure temperatures at multiple points
- Check water pressure: Test static and dynamic pressure at fixtures
- Inspect valve operation: Assess cartridge, anti-scald, and balancing functions
- Evaluate pipe condition: Check for corrosion, scale buildup, insulation
- Test recirculation systems: If present, verify proper operation
- Check water heater: Verify temperature, pressure relief, and dip tube
- Provide written estimate: With options and cost breakdown
- Explain code compliance: Ensure solutions meet local plumbing codes
Questions to Ask Your Plumber
Essential Questions Before Hiring:
1. Are you licensed and insured for both plumbing and any required electrical work?
2. What is your diagnostic process for temperature problems?
3. Do you provide written estimates with detailed scope of work?
4. What warranties do you offer on parts and labor?
5. Can you provide references for similar shower repair work?
6. Do you carry manufacturer certifications for specific brands?
7. What safety testing will you perform after repairs?
8. How do you handle unexpected issues discovered during repairs?
Conclusion: Mastering Your Home’s Hot Water System
A shower that won’t get hot is more than an inconvenience—it’s a complex plumbing puzzle with multiple potential solutions. By understanding the principles outlined in this guide, you’re equipped to diagnose and fix most common hot water problems in your shower.
Key Diagnostic Principles:
1. Isolate the problem: Sink has hot water but shower doesn’t? Problem is in the shower system.
2. Think systematically: Follow the diagnostic flowchart to eliminate possibilities.
3. Understand valve types: Pressure-balancing vs thermostatic valves have different failure modes.
4. Consider the whole system: Pipes, insulation, water heater, and recirculation all affect temperature.
5. Safety first: Anti-scald devices protect against serious burns—adjust carefully.
Most shower temperature problems are solvable with basic DIY skills and the right parts. The shower valve cartridge replacement outlined in this guide solves approximately 70% of “shower not hot but sink is” problems. For more complex issues involving thermostatic valves, recirculating systems, or whole-house temperature problems, professional assistance may be warranted.
Remember that plumbing systems involve both water and, potentially, electricity or gas. If you’re ever uncertain about any repair, consult a licensed professional. The cost of professional repair is often justified by the expertise, warranty, and assurance that the job is done correctly and safely.
Final Safety Reminder: Always turn off water at the main valve before attempting any plumbing repairs. Test for hot water temperature with a thermometer, not your hand, to avoid burns. If working with gas water heaters or electrical components, consider professional assistance. Water damage from DIY mistakes can be costly—when in doubt, call a professional plumber.